Building a home server is a practical project that can bring significant benefits to your digital life. This guide was built to help you understand the essentials of setting up your own home server, tailored to your needs and interests.
Whether your goal is to store important documents, manage a personal media library, or create a private cloud for your family, a home server is a valuable tool. It offers flexibility and customization that off-the-shelf products often lack. For those new to this concept, the process of building a server can seem complex, but it’s more straightforward than you might think.
In this guide, we’ll break down the key steps in building a home server. From choosing the right hardware components to installing and configuring the necessary software, we want to simplify each stage of the process. Our objective is to equip you with the knowledge to construct a server that suits your technical abilities and meets your specific needs.
As we begin this guide, we’ll first address a fundamental choice: whether to build your own server or buy a pre-made one. Let’s explore the pros and cons of each option to help you make an informed decision.
Building a home server provides significant digital benefits. It can store important documents, manage personal media, and create a private cloud. You can buy a pre-made server or create a custom one, each with its pros and cons. This choice depends on your needs, skills, and budget. Set up involves choosing the right hardware and software, installing components, configuring the network for remote access, and managing data with backup strategies. Tools like Stablebit Drivepool simplify data management, combining drives and offering automatic redundancy.
Build vs Buy
When it comes to setting up a home server, one of the first decisions you’ll need to make is whether to buy a pre-built solution or to create your custom-built server. There are pros and cons to each option, and finally, the best choice for you will depend on your specific needs, technical skills, and budget.
So, why might you opt for a pre-built server? For starters, they’re quick and straightforward to set up. You won’t need much technical expertise since these systems are designed for the average consumer. That means you can get your home server up and running without delving into the nitty-gritty of computer hardware.
Another benefit is the ease of return. If there’s a problem with the machine upon arrival or down the line, you can likely return or exchange it under the manufacturer’s warranty. This peace of mind isn’t always an option with custom builds.
Cost is another factor. Sometimes, a pre-built server can be cheaper, especially when considering the time you save on assembly and troubleshooting. But is that saving a trade-off for limitations?
Now, let’s switch gears and talk about custom builds. You’re thinking, “Why would I want to rack my brain and sweat over assembling hardware?” Good question! The answer lies in the degree of personalization.
With custom builds, you’re not limited to a one-size-fits-all solution. Rather, you can tailor every aspect of your server to perfectly match your specifications. This flexibility can be particularly beneficial for specific projects, like setting up a home media center.
Why is this? You might need unique components, such as extra hard drive bays, advanced cooling solutions, and motherboards with plenty of hard drive ports. These customizations might not be readily achievable with most store-bought computers.
In the process of building your home server, you also gain valuable knowledge. You learn about the inner workings of a computer, which can be incredibly useful for future troubleshooting or upgrades. Plus, with a custom build, you often obtain a higher quality machine, as you have complete control over the components you include.
But don’t discount the potential of a pre-built server! Although this route might seem more “vanilla,” it promises a quick setup and ease and could save you money. On the other hand, if customization, quality, and a learning path appeal to you, maybe a custom build is the way to go. Finally, the choice isn’t about which is inherently better but about which better suits your needs, skills, budget, and preferences. What are your needs calling for?
Choosing the Right Hardware
Your hardware choice greatly impacts how well your server works. Yep, I’m talking about something as simple as the heart of your car–the engine. It controls speed, reliability, and, in general, performance, just like your server’s hardware. If you go with cheap hardware, your server may not do as much. It’s sort of like how a weak engine limits a car’s performance.
Now, let’s get real—when choosing the stuff for your server, you’ve got to think about three main factors: processing power (that’s the CPU), memory (the RAM), and storage. You could say these are like your server’s heart, brain, and strength.
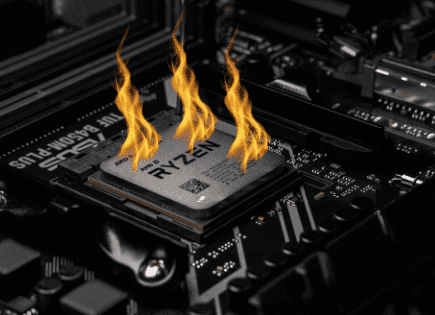
The CPU is a big deal, and that’s not an overstatement. You need to look at whether your server is going to host a lot of websites or just one. Will it be churning through videos or streaming media? The answers you come up with may mean you need a CPU with lots of cores and a fast clock speed. Some of the go-to picks are Intel Xeon and AMD Ryzen. Before you skimp on a CPU, realize just how hard video encoding is on your CPU and how Plex handles encoding. The last thing you want to see on movie night is a giant loading wheel on your TV.
Let’s talk about memory; why is it so important?
RAM in your server decides how good it is at doing many things at once. More RAM means more programs can run at the same time without clogging up performance. An 8GB RAM could do the trick for you, but—if you’re dealing with heavy-duty tasks—a RAM over 16GB can seriously speed up your server’s multitasking power.
Storage is the next thing to think about. The way you plan on using your server will matter here. Do you need a speedy solid-state drive (SSD) or a slow but big hard disk drive (HDD)? Well, that all depends on what you need.
Take a moment, too, to think about your server’s noise and how it releases heat. No one wants their living room to feel like an airport runway, right? So, select parts that won’t make your machine too hot or noisy, making cohabiting with it a convenient experience.
Finally, plan for the future. Look ahead a few years and ask yourself if your chosen hardware will still hold up. You don’t want new versions and updated models making your once cutting-edge machine old news.
Operating Systems and Software
In building a full home server, one must understand that the operating system and software are just as integral to the process as the nuts and bolts hardware equation. So, how do you determine which is better suited for your home server build — Linux or Windows? Well, it all boils down to the specific requirements you have in mind, your experience level and your intended usage.
Consider Windows – familiar, user-friendly, and similar to the operating system you navigate every day on your personal computer. When you think of a general-purpose server, your mind likely drifts to things like media servers, file servers, or perhaps even game servers. If this sounds like you, then Windows might be a natural fit.
Have you ever set up something like a Plex server? Try it on Windows, and you’ll likely find the process pretty straightforward. And Windows has many uses beyond being more user-friendly and simpler to navigate. You’ll find support for a wealth of applications and programs you use every day. The learning curve isn’t steep, and you’ll be up and running in no time. So, why wouldn’t you choose Windows for your server build?
But then, we have Linux. Now, you might immediately think of intimidating command lines, but don’t let this put you off just yet. Hear us out.
Linux is arguably more stable and purpose-built to function as a server. It’s favored by developers and professionals alike for its performance and security. Plus, it’s more customizable and can be tweaked to just about any extent you can imagine. Yet, perhaps the most compelling reason to consider Linux is Docker.
Do you plan to run power-user tools? Docker should be your best friend. Docker is an open-source platform that automates the deployment, scaling, and management of applications. It’s a dream on Linux – responsive, efficient, and unparalleled in terms of reliability. But fire up Docker on Windows, and prepare for a possible episode of headaches and hair-pulling instances!
Power-user tools and Docker? These two ride in perfect harmony on Linux. But keep in mind that Linux does come with a learning curve. For novices venturing into this territory, it can seem daunting.
Looking to build a web server or something exposed to the internet? Your best bet would likely be a Linux server. It may require more effort and understanding to set up. Still, the rock-solid reliability, high-level customization possibilities, and compatibility with Docker make it worth the extra work. Is Linux the right choice for you, or does Windows meet all your requirements? It’s not a question of which is better in general, but which is better for your particular situation. Your goals, your experience level, and what you intend to use your server for will finally guide this choice.
Installing Components Into Your PC Case
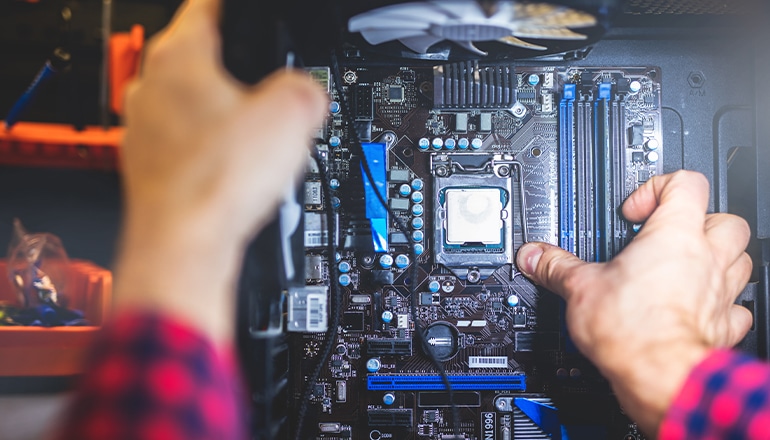
Embarking on a path to build your own home server feels intimidating, doesn’t it? Especially if you’re a beginner in PC building, you might find the process of installing components somewhat challenging. But let me put you at ease – with the advent of technology, the process has become much more straightforward than it used to be.
First off, let’s understand what we’re dealing with: The heart of your PC, known as the Central Processing Unit (CPU), nestled securely onto a motherboard, constitutes the first step in building your home server. Scary? It doesn’t have to be. My advice? Watch a YouTube tutorial on how to install a CPU into a motherboard. This will ensure you have a solid understanding of the process. Why YouTube, you ask? Being a visual platform, YouTube facilitates learning by allowing you to pause, rewind, and replay as many times as needed – a useful feature when dealing with intricate details of PC building.
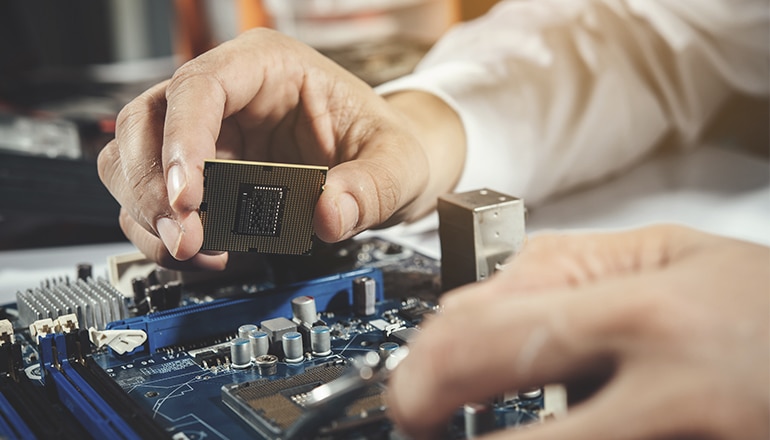
After the CPU and motherboard installation, you may wish to proceed with installing the other components. These could include a hard drive, graphics card, fans, power supply, and more. It seems like quite a list, doesn’t it? Once again, here is where breaking down the steps comes in handy. You can search for individual videos demonstrating how to install each component – allowing you to tackle one step at a time and preventing you from feeling overwhelmed. Alternatively, if you’re feeling adventurous, you can dive straight into a complete custom-built tutorial video.
Delving into the mechanics, the design of modern components is far more user-friendly, precluding mishaps that might cause irreversible damage to your PC. For instance, you’ll find that most components have notches, basically a foolproof guide dictating exactly how they should be installed. There’s only one way to install a video card, only one way to fit memory and only one way to connect your power supply cable. Sounds easy, right?
But keep in mind that every rose has its thorns. Consequently, the biggest pitfall to avoid is the unintentional grounding of your motherboard on your PC case, which can cause short-circuiting and compromise the integrity of your server. Can you imagine the headaches? Don’t worry, though; by ensuring that your standoffs are solidly in place, you can steer clear of this common mistake.
Building your home server: It’s a task that seemingly poses challenges for beginners. But with the right guidance and an eager, can-do attitude, the process of installing components can be just another step in the exciting path of creating something from scratch. Now, isn’t that satisfying to wonder over?
Network Configuration and Remote Access
One integral aspect of building a full home server is network configuration and remote access. But what does this mean? On a basic level, network configuration refers to setting up your network so devices can communicate with each other and the internet. Remote access, on the other hand, allows you to access your home server from another location.
So, how does this play out in real life?
Say you’re traveling, and suddenly, you realize you need to access a file from your home server. Sounds tricky, right? Not necessarily. With remote access tools, this potential headache becomes a breeze. There’s a range of tools available, remaining both simply accessible for the beginner and complex enough to cater to the expert.
Let’s jump into these resources.
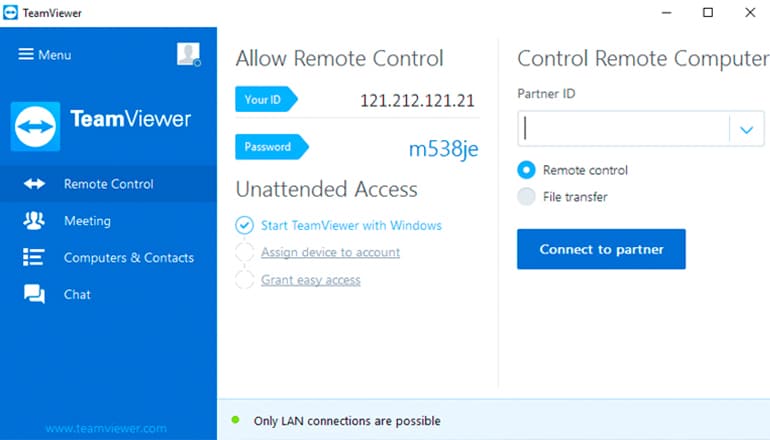
Kicking off with simpler tools, we have applications like TeamViewer, AnyDesk, and Jump Desktop. These tools are great because they provide an interactive graphical interface that’s easy to comprehend. Basically, your home server’s desktop screen is mirrored onto your device wherever you decide to access it. Direct, simple, secure.
Have you ever opened a complicated instruction manual and found it surprisingly easy to follow? That’s TeamViewer for you. This tool, also applicable to AnyDesk and Jump Desktop, helps you manage your files, install updates, or troubleshoot issues without any major network-related know-how.
Now, suppose you’ve mastered these tools and crave more bite-sized complexity. That’s where SSH, FTP, and RNC come into play.
SSH, or Secure Shell, is a network protocol that provides a secure way to access a remote device. With SSH, you’re looking at handling text-based commands, slipping into a more advanced spectrum. Still, it’s secure and efficient and opens up a wider group of actions to perform on your server.
FTP, or File Transfer Protocol, is all about transferring files from your home server to another machine. Keep in mind our earlier scenario of needing to access your files while traveling. FTP is your knight in shining armor, ready to defend and serve!
Finally, RNC, or Remote Network Computing, offers further expansive control over your server by transmitting keyboard and mouse events from one device to another.
Funny enough, isn’t it? The same devices you were worried about leaving behind are now right within your grasp. Be it TeamViewer’s familiar face, SSH’s dynamic abilities, or RNC’s extensive reach, network configuration and remote access transform your server into a more manageable and user-friendly entity.
Data Management and Backup Strategies
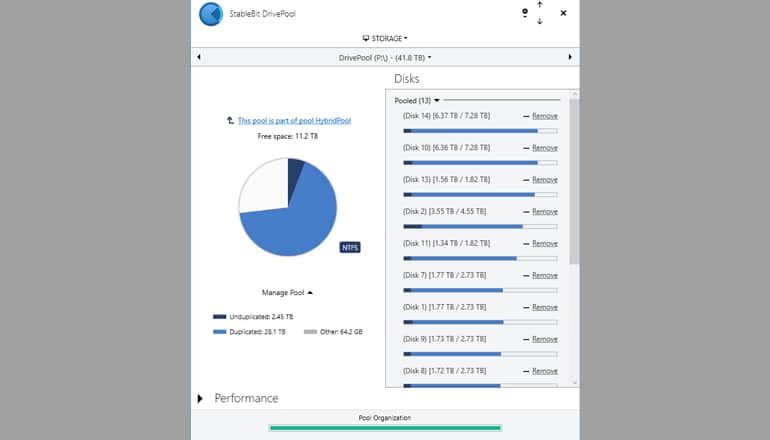
Managing your data is an important aspect of building a full home server, and if you ask me, one indispensable tool for this task is Stablebit Drivepool. Have you ever wished you could see all your drives as one without the hassle of handling them individually? Well, this is where Stablebit Drivepool steals the show.
It’s a fantastic tool that combines all your drives into one, like a super-powered conductor for an orchestra of drives. All the instruments might be playing something different, but the conductor brings them together to create harmony. Stablebit Drivepool does just that, making data management on your home server a breeze.
And boy, does this tool pack a punch in terms of features. My personal favorite? The automatic redundancy. It’s almost like having a safety net for your data. What’s not to love about that?
With I/O striping, Stablebit Drivepool will ensure a well-balanced flow of data across all your drives. What this means is that there won’t be unreasonable pressure on any one drive, enhancing the performance and longevity of all your drives.
On top of this, you don’t need to worry if a drive fails. The automatic redundancy feature will make sure your data is safe. Stablebit has your back! Now, should you lose a drive or two, your heart won’t skip a beat. Isn’t that peace of mind?
Another aspect that I particularly love is that it makes your software’s job so much easier. You only need to access one single drive rather than having to learn and manage a multitude of them. This is particularly beneficial for media servers like Plex, allowing them to smoothly interface with all your hard drives.
Even more, you have the ability to hide all the “real” drives in Windows, leaving only your Drivepool drive visible. This functionality simplifies the process, removing unnecessary complexities. After all, who needs to see the mess backstage if the performance on stage is spot on, right?
Though, as marvelous as Stablebit Drivepool is, it shouldn’t be the only backup system in your armor. There are other backup options that you can consider, such as Carbonite. Redundancy of your data is always a good idea, an additional safety, if you will. Did you know even SSD drives are not immune to data loss?
No matter how incredible your home server build is, if your data isn’t protected enough, it can all come crashing down. It really pays to invest time, money, and effort into the essential task of data management and backup.
And there you have it. Building your very first home server might initially feel like a tremendous feat, but with enough time, patience, and resourcefulness, it’s a task you’re more than equipped to handle. A rewarding, satisfying outcome awaits you at the end, where you can say, “I built this!”
Tom DeKoek, the lead strategist at Good Home Automation, possesses over a decade of expertise in technology and smart home. With a genuine knack for tech and an extensive history of troubleshooting, Tom has emerged as a trusted authority in home automation. Serving millions annually, Good Home Automation, under his guidance, provides precise, actionable advice, ensuring users overcome tech hitches and enjoy their devices to the fullest. Connect with Tom on LinkedIn