Nest Thermostat Not Turning On (Here’s how to fix it!)
Nest thermostats are a very popular smart home product, and for good reason. Their simplicity and ease of use make them a leader in the market.
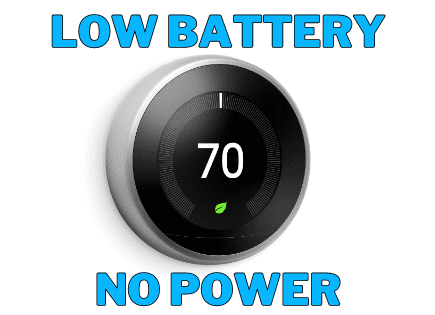
But like all home technology, they can sometimes run into issues. The most common for Nest Thermostats are power issues. Sometimes they appear to have no power and won’t turn on.
In this troubleshooting how-to, I will help you diagnose your issue and give you several options on how to fix your Nest Thermostat not turning on issue.
Nest Thermostat not turning on
When your Nest Thermostat won’t turn on, it is likely that you have a wiring issue. First, we’ll diagnose the issue to see if there is an easy fix. The best long-term solution is to add a C wire or the Google Nest Power Connector to feed continuous power to your Nest Thermostat.
Is there a blinking light on your Nest Thermostat?
There are a few indicators that will help you diagnose and troubleshoot your Google Nest Thermostat not turning on issue.
If your display is off and there appears to be no power, then you’re in the right place. If you are seeing a low battery or delayed message on your thermostat, then I’d recommend clicking the links to previous articles we’ve posted to fix those issues.
Jump to:
Blinking Green Light
If you see a blinking green light at the top of your Nest Thermostat, don’t stress, this means it is updating the software.
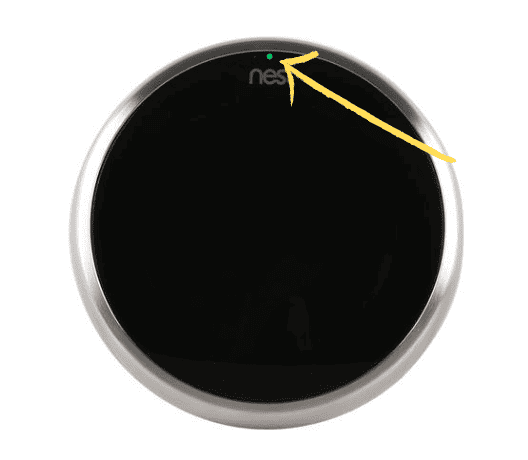
Software updates should only take a minute or two and then the thermostat will restart and reboot. If the green light blinks for more than 15 minutes, your device is likely frozen.
There are two options to unfreeze your Nest Thermostat:
Option 1: Reset the Nest Thermostat
For the Nest Learning Thermostat or Thermostat E, follow these directions:
1. Click and hold the center button for 10 seconds until the screen shuts down, then release it.
Since your screen is already off, hold it for at least 10 seconds or longer.
2. Click and release the display again. It should now restart.
It may have to download the update again but it should then restart without a problem.
For the Nest Thermostat, follow these directions:
- Pull the thermostat off the base
- Remove the batteries from the device
- Replace both AAA batteries with new batteries or, if you don’t have any, a set that you know is working
- Reattach the thermostat to the base and allow it to restart
Option 2: Remove the display from the base and replace it
- Gently pull the display off the base
- Reconnect the display to the base
This will force the device to reset. It may have to download the update again but it should then restart without a problem.
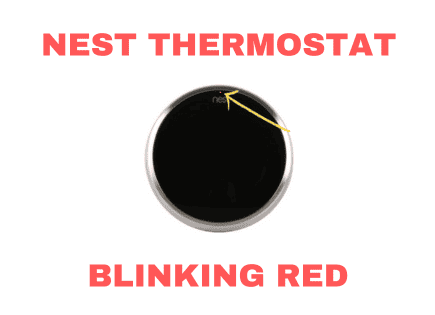
Blinking Red Light
A blinking red light indicates that your Nest Thermostat’s battery is charging.
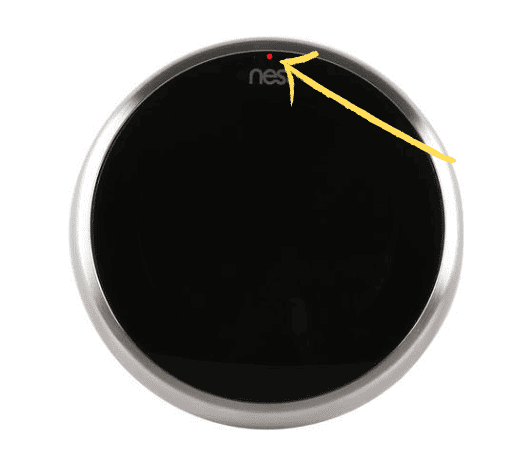
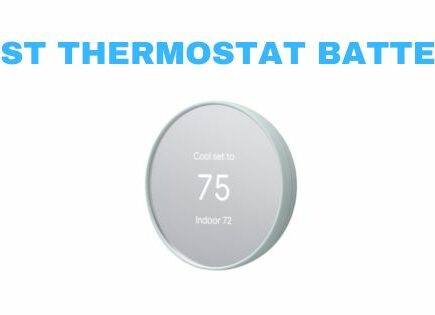
Smart thermostats like yours have an internal rechargeable battery. If the battery does not receive enough consistent power to charge the battery, the device will begin to shut off core functions to save energy. In your case, it appears to have shut down all functions.
It could take up to an hour for the battery to charge enough to restart. However, you’ll continue to have this power issue until you fix the underlying issue. Jump down to the troubleshooting section to get started on a fix.
No Blinking Lights
No blinking lights on your Nest Thermostat indicate that there is absolutely no power going to your device.
This could mean that the battery is fully drained or that you truly have no power going to your thermostat.
Step 1: Check if the display is properly secured to the base
1. Remove the Nest Thermostat from the base.
2. Inspect the thermostat wiring. It is possible that the wires are too bulky and are pushing the display off its base.
NOTE: Before doing any electrical work, always turn off the power at the circuit breaker at the electrical panel!
3. If it is clear that the wiring is too bulky and you cannot push the wires into the wall, then you can cut and strip each wire to reduce its size.
Here is a link to a post on how to cut and strip a wire.
Step 2: Check if your breaker tripped
1. Go to your electrical panel (breaker box)
2. Find the correct breaker that powers your thermostat
3. Whether it has been tripped or not, switch it off and then back on
4. Now, also check to see if any other breakers are tripped. If your cooling system or furnace breaker has tripped, your Nest might not receive any power.
Step 3: Check the fuse box
If you have a fuse box, you can also check for a blown fuse.
If your display was already properly connected on the base and there aren’t any issues with your electrical, the below fixes will solve your Nest Thermostat not turning on issue.
How to troubleshoot Nest Thermostat not turning on
When your Nest Thermostat won’t turn on, it is likely that you have a wiring issue. To understand if that is your situation, remove the display from the base.
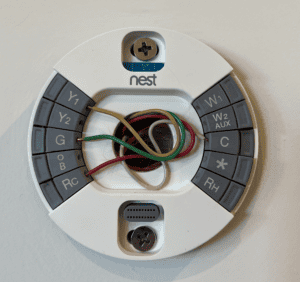
Check the Wiring
You will likely have 3-5 wires connected to your Nest. Below you will find a breakdown of each and its purpose.
| Wire Color/ Name | Where the Wire Connects to the Thermostat | Purpose of the Wire |
|---|---|---|
| Red Wire (R wire) | Connected to Rc or Rh | This is the power wire (NOT continuous like the C wire) |
| Yellow Wire (Y wire) | Connected to Y1 | This is your cooling (air conditioning) |
| Green Wire (G wire) | Connected to G | This is the fan |
| White wire (W wire) | Connected to W1 | This is your heating |
| Blue wire (C wire) | Connected to the C | This is the Common wire that supplies your smart thermostat with continuous power |
The key to the C wire for smart home thermostats like the Nest is that it continuously powers the thermostat. Without continuous power, the battery could drain and cause many of the issues you are likely facing.
At this point, it is likely that you do not have a C wire.
Below we have listed several workarounds and permanent fixes you can try.
Fix #1: Charge with a USB cable
When you pulled your Nest off the wall, you might have noticed a USB port on the back.
Although this is a short-term fix, you can charge your Nest Thermostat battery using the USB port. You WILL have to do it again in the future, but it is the simplest and fastest solution for this issue.
Your Nest Thermostat came with a charging cable. If you don’t have it anymore, there are two different cables you can use depending on which Nest you have.
For the Nest Learning Thermostat (2nd and 3rd generation) or the Nest Thermostat E, use a micro-USB. If you don’t have a micro-USB or don’t know what they look like, here’s one from Amazon.
For the Nest Learning Thermostat (1st generation), use a mini-USB. If you don’t have a mini-USB or don’t know what they look like, here’s one from Amazon.
1. Pull your Thermostat off the wall.
2. Plug the charger into the Nest. Then plug the other end into a USB wall charger. Do not use a computer or USB port from another device. You likely have a USB wall charger connected to another device, like an iPhone charger.
3. Make sure a blinking red light at the top of the device is visible. This confirms when it is charging.
4. Charging could take several minutes or up to an hour. If it takes longer than an hour, you might have another issue.
5. Once the device has enough charge, the display screen will light up with a message to reconnect to the base. Reconnect it to the wall base to complete the fix.
You should have resolved your Nest Thermostat not turning on issue and the device should now have power. But remember, this may not be a permanent solution. Read on for other more permanent fixes.
Fix #2: Double Check Compatibility
If you aren’t certain if your Nest Thermostat is compatible, it’s a good idea to check before you move on to the next steps.
An incompatible thermostat might still work but it won’t get enough power to keep the internal battery charged.
Google Nest makes it easy to check. Use this link to the Google Store website to check your compatibility.
IMPORTANT SAFETY NOTE: Turn off all power at the circuit breaker!
When working with electrical wires, be sure to turn off the circuit breakers in your electrical panel. For your thermostat, you can turn off the circuit breakers. For your furnace, you can turn off the circuit breaker or unplug it.
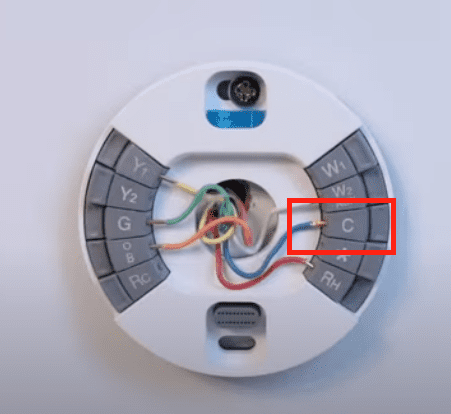
Fix #3: Check if You Have an Unused C Wire
Sometimes the C wire was never connected. This would be lucky, but it’s possible.
To begin, detach your Nest Thermostat from the wall and inspect its wiring. Look to see if any wires remain unconnected. Is there an unconnected blue wire that has been tucked into the wall? You may need to remove the wall plate to locate it.
You can also check at the furnace. Look for the control board with the other wires attached to them. It is likely behind a metal panel and you’ll have to remove a few screws to get to it.
Refer to the below image for an example of what your control board might look like.
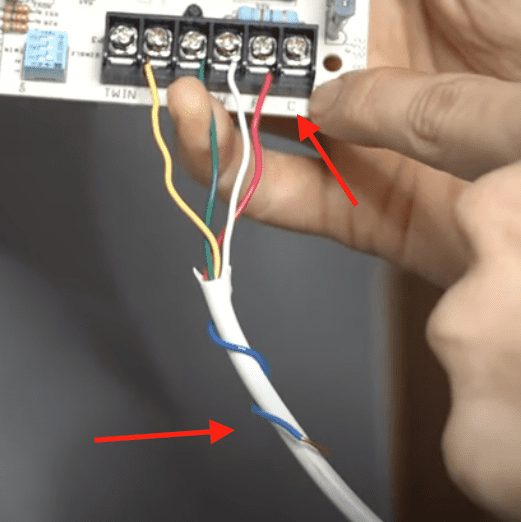
If you found an unconnected blue wire, try the steps below. If not, move on to the next solution.
1. Be sure you turned off the power to the furnace and the thermostat.
2. At the furnace, unwrap the unused blue C wire.
3. On the control board, use a screwdriver to unscrew the C with just a couple of turns. You’re just loosening, don’t take the screw out.
4. This step might be slightly different depending on the furnace at your home. Make a hook with the metal piece at the end of the blue wire and connect it to the screw above the C. There could also be a terminal that you slide the wire into directly. In both cases, tighten the screw once you’ve attached the wire.
Note: A wire might already be connected to the control board’s C terminal. That is coming from your outside air conditioning unit. That is OK, you can connect a second wire.
5. Once the wire is connected to the furnace, it is time to return to the Nest Thermostat’s wall plate. Find the blue wire and plug it into the C.
6. Place the Nest Thermostat back on the wall plate. You might see a red light blinking so that it can recharge the internal battery. But it will power back on soon.
Now that you’ve connected the C wire, you should never face battery issues again.
Fix #4: Use the Google Nest Power Connector
Google Nest knows its customers have been facing power issues with their thermostats and they created the Google Nest Power Connector for customers that do not have a C wire.
You’ll have to buy the device. Here is a link to the Google Store, or you can check the price on Amazon.
Note: If you want to avoid spending any money, scroll down to the next section called ‘Use the G Wire as a C Wire.’
Here’s an explanation directly from Google Nest.
Since this solution was designed by Google Nest specifically for a missing C wire, you can bet it’s a great, long-term fix. With this device, you will no longer have a Nest Thermostat not turning on power issue.
If you don’t want to spend the money or don’t want to wait for it to arrive, the next fix might be the right solution for you.
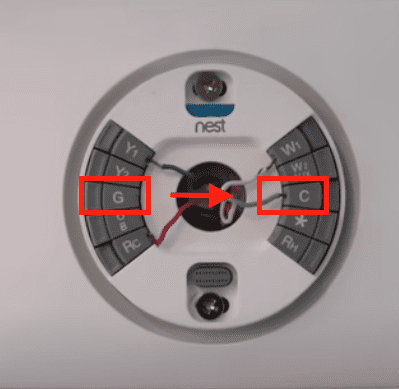
Fix #5: Use the G Wire as a C Wire
Here’s a free solution that will work for most of you that requires switching one wire.
You can use your G wire for your fan as the C wire (common wire) to power your Nest Thermostat.
The one downside to this solution is that you will lose your ability to use your fan. That means your fan on its own. It will still work to blow cold air when you turn on your AC unit.
Consider how often you use your fan on its own. Most people rarely, if ever, use their fan. Losing this feature is not a big deal for the majority of users.
Note: You will need wire cutters if you have central air conditioning.
1. Start by turning off the power to the furnace and the thermostat.
2. Remove the Nest Thermostat from the wall so the wires are visible.
3. Find the G wire (green wire). Press on the plastic piece to release and pull the wire out. Now you can reconnect that wire to the C. Push it in firmly.
4. Go to your furnace and find the control board. You will likely need to remove the metal cover by removing a few screws.
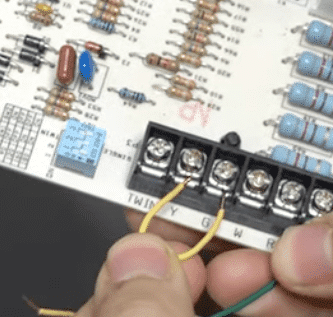
5. Look for the 4-wire thermostat wiring and the terminal block they are connected to (see image below). It will look something like this, but many are slightly different.
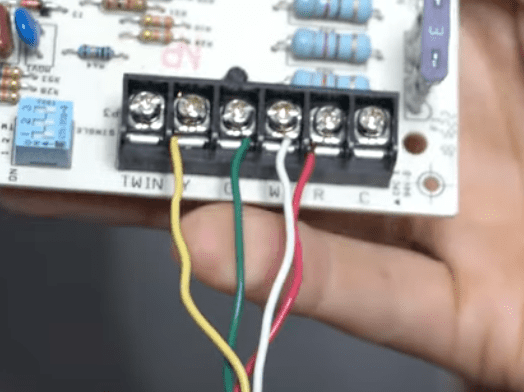
Note: Two more wires will be attached to the terminal block if you have central air conditioning. Those wires will attach to Y and C. If this is your situation, you’ll have one extra step.
6. Remove the G wire and move it to the C. You’ll need to loosen the screw (don’t remove it) for both the G and the C.
7. If you have central air conditioning, you’ll need to add a jumper wire from the Y to the G. That will allow the fan to operate when your air conditioning turns on. You can cut a long piece of wire and strip both ends for your jumper wire.
8. Now, you can close up your furnace, reattach the thermostat to its wall plate, and turn the power back on. Your Nest Thermostat should now restart and have full power.
If this is not the right fix for you, there are two more options below.
Fix #6: Use a Common Wire Transformer
Here is another option if your Nest Thermostat won’t turn on and you are missing the C wire. I must say this is not the best-looking solution and is not as great of an option as the solutions I’ve already covered. I don’t recommend this solution unless absolutely necessary.
You probably don’t have one of these lying around, so you will need to order a common wire transformer. Here’s an option from Amazon.
This is a 24-volt transformer that will supply continuous power to your Nest Thermostat so that the battery stays charged and you don’t lose power.
1. As always, turn the power off to the thermostat at the electric panel.
2. Remove the Nest Thermostat from the wall plate.
3. Insert one wire into the C and the second into the Rh or Rc.
4. Insert the plug into a wall outlet.
5. Reattach the Nest Thermostat to the wall plate.
6. Go back to your electrical panel to turn the power back on.
Your thermostat should begin to power up and have a constant power supply.
But now you can see what I mentioned in the first paragraph of this section. There is a wire dangling from your thermostat and that doesn’t look so great.
There are ways to hide the wire in the wall, but that will be difficult and potentially costly.
Fix #7: Convert From a 4-Wire Thermostat Wire to a 5-Wire Thermostat Wire
If you’ve reached this point, the number of wires in your Nest thermostat wiring is likely the cause of your issue.
Smart thermostats, unlike standard thermostats, require a continuous power supply due to their advanced features. They rely on a stable Wi-Fi connection and transmit data for remote access via apps like the Nest App, as well as energy-saving temperature features. This is why a common wire is important and why the thermostat battery drains without one.
Standard thermostats, on the other hand, do not require continuous power and often operate on alkaline batteries alone.
Many homes and HVAC systems were installed prior to the introduction of smart thermostats and, therefore, only have a 4-wire thermostat wire designed for standard thermostats.
More recently constructed or renovated homes typically have a 5-wire thermostat wire to accommodate smart thermostats.
It is feasible to upgrade your system by rewiring it with a 5-wire thermostat wire. The complexity of this task depends on your home’s construction and your ability to access areas between floors.
I recommend reaching out to a professional or conducting thorough research on how to replace wires in your specific home.
Contact Nest Customer Support
If you still have issues, I recommend contacting Nest’s customer support and contacting a local HVAC technician. They will be able to fix your Nest Thermostat not turning on.
They can diagnose and help fix problems with your system and thermostat installation.
Conclusion
There are several fixes to your Nest Thermostat not turning on issue. First, you must diagnose the problem by checking if there is a blinking light.
If your thermostat is blinking red or not at all, you can try the many fixes we discussed that are listed below.
- Charge with a USB cable
- Double check compatibility
- Check if you have an unused C wire
- Use the Google Nest Power Protector
- Use the G Wire as a C Wire
- Use a Common Wire Transformer
- Convert From a 4-Wire Thermostat to a 5-Wire Thermostat Wire
- Contact Nest Customer Support
It’s frustrating if your Nest Thermostat won’t turn on or any of your smart devices stop working. Hopefully, you have now fixed your issue permanently.