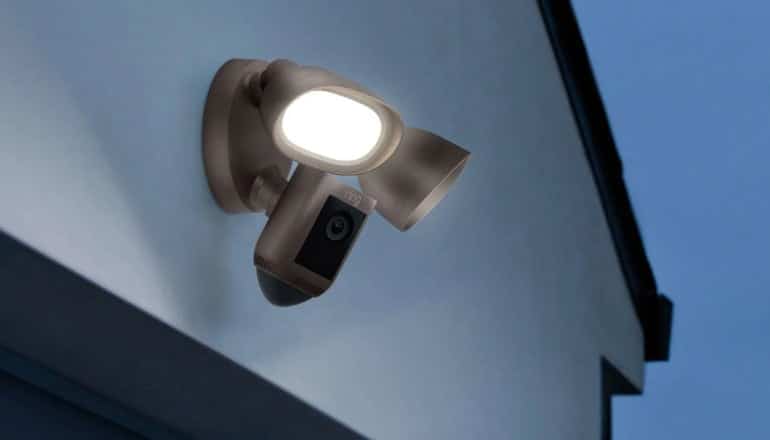
DIY: Install Ring Floodlight Cam Without Existing Wiring
Installing a Ring floodlight cam without existing wiring can seem a little scary. But, with the right tools, some practical steps, and your fearless DIY spirit – even this becomes a pretty achievable task.
You’ll be able to harness the power of outdoor cameras that illuminate dark corners while keeping tabs on human-sized objects crossing their path – think uninvited guests or furry trespassers. Plus, imagine being in control of these features straight from your phone! Cool stuff!
Keep reading, and before you know it, you’ll be handling wires like a seasoned electrician.
Tools and Parts Needed to Install The Ring Floodlight Cam
If you’re looking to beef up your home’s security with a Ring Floodlight Cam and if you lack existing wiring, you’re in the right place. Here are practical steps and the essential tools you’ll need to streamline the installation.
Begin by selecting the prime location for your floodlight cam. A spot that offers a comprehensive view of outdoor areas and identifies human-sized objects in its motion detection is ideal. This setup reduces false alarms and ensures it activates when needed. Consider a higher mounting position for vast coverage, but remember, it should still be accessible for periodic maintenance tasks such as lens cleaning.
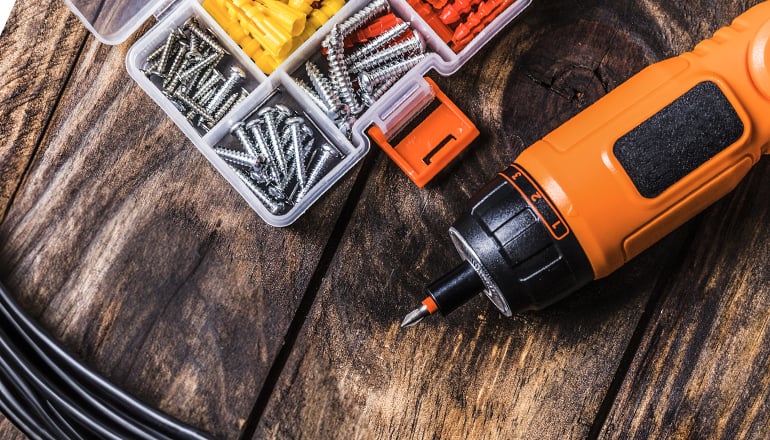
In terms of tools and materials:
- A power drill and Phillips screwdriver are the foundational tools.
- 14/2 gauge Romex wire, vital for connecting the circuit breaker to the floodlight cam. It includes both black (hot) and white (neutral) conductors.
- Round junction box, a protective case against weather conditions, perfect for exterior connections.
- UF adapter ensures your Romex wire safely connects with outdoor fixtures.
- Wire nuts, also known as cap nuts, guarantee safe connections, eliminating chances of shorts or fires.
- A pull switch and a cover allow manual control over the light fixture’s power.
After deciding on the placement, initiate the installation by setting up the junction box and drilling holes as needed for wiring. Run the power wires from an existing circuit breaker to the floodlight cam, using the wire nuts to establish safe connections.
Preparing the Junction Box and Wiring for the Ring Floodlight Cam
The first step in getting your Ring Floodlight Cam up and running is to prep the junction box. A sturdy, blue plastic junction box, typically used for this kind of job, will serve as a reliable base.
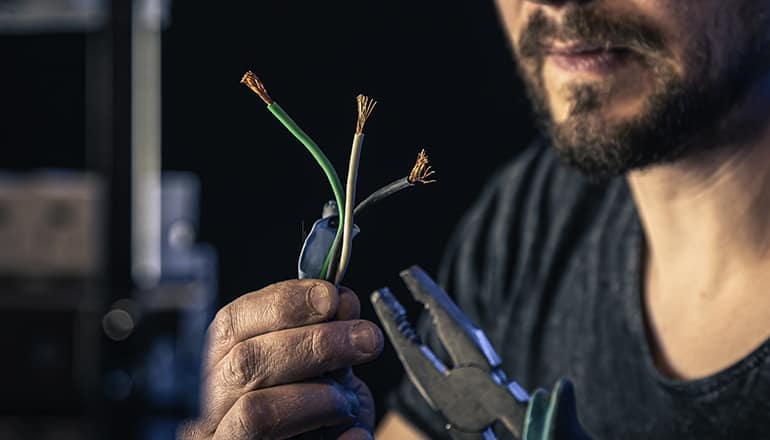
To start off with wiring, you need three types: hot (black), neutral (white), and ground wires. Don’t fret if it sounds like a complex task–it’s more akin to assembling a jigsaw, where each piece fits into its spot.
Your black wire acts as your “hot” wire—think of it as the highway on which current travels to power your floodlight cam.
The white one is known as the “neutral” wire that provides a safe path back after electricity does its job. You’ll want to secure these two together using something called cap nuts—a handy little tool that keeps things tight. Just imagine them acting like mini handcuffs linking our hard-working wires together.
Last but not least comes our unsung hero—the humble ground wire—an extra layer of protection ensuring any stray currents return safely to earth instead of causing unwanted shocks or even fires.
All set? Great. Now, all you have left are those fresh connections waiting inside your home. With Romex 14/2 gauge cable serving as the cord that connects everything together, think about it as creating a safe pathway for current to flow.
Now that your junction box and wiring for your Ring Floodlight Cam are prepared, we’re ready to start mounting the camera.
Remember, this process involves running wires into your home’s interior and making connections between all parts of the installation—it may sound like hard work, but just imagine being able to control outdoor lighting from the inside.
In my experience, having installed several Ring Floodlight Cams over time, I can tell you that once these steps are completed correctly, everything else will fall right into place—just like magic.
Note: Safety should always be a top priority when dealing with electricity. Always ensure power is off before starting any electrical project, and consult with a licensed electrician if in doubt about anything in your home.
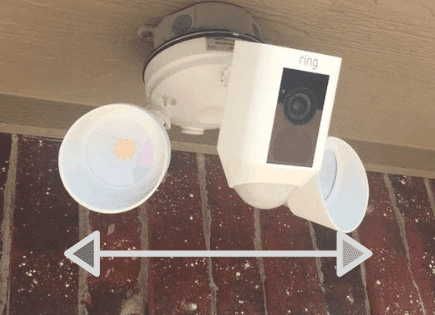
Mounting the Ring Floodlight Cam and Connecting the Wires
After gathering your tools in hand, it’s time to begin installation. We’ll start with mounting your Ring Floodlight Cam.
You’ll need a solid mounting location for stability and optimal performance. Find an outdoor spot that allows a clear view of human-sized objects moving in its field of vision.
The first step is securing the included mounting plate onto your chosen spot using bracket screws. Make sure it’s firmly attached so that there won’t be any movement once we attach our floodlight camera.
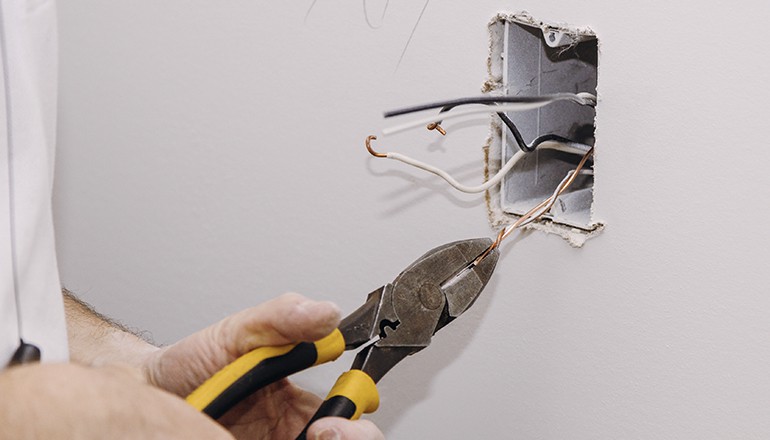
When you find the junction box, you’ll usually see three different types of wires. As we talked about earlier, there’s a black one (which is the hot wire), a white one (which is neutral), and either a green or copper wire (which is the ground). It’s important these wires are straight and not tangled. You may need to take off about 1/2 inch of insulation from the ends with wire strippers if you need to.
Now, take the black wire from your Ring Floodlight Cam and twist it together with the black wire from the junction box. You can use a screw cap nut for this. This will make sure they’re tightly connected. You need to do this with the white wires, too. The last thing to do in this part is to connect the ground wires, which will probably be green or copper.
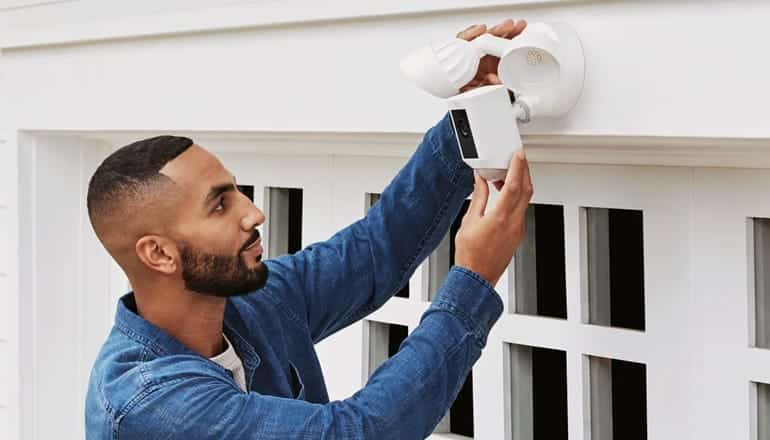
After you have wired everything, you need to carefully push the wired part through the center hole of the mounting plate. Then, you align your Ring Floodlight Cam to match up with the plate by turning it to the right. It should make a clicking sound when it’s tightly attached.
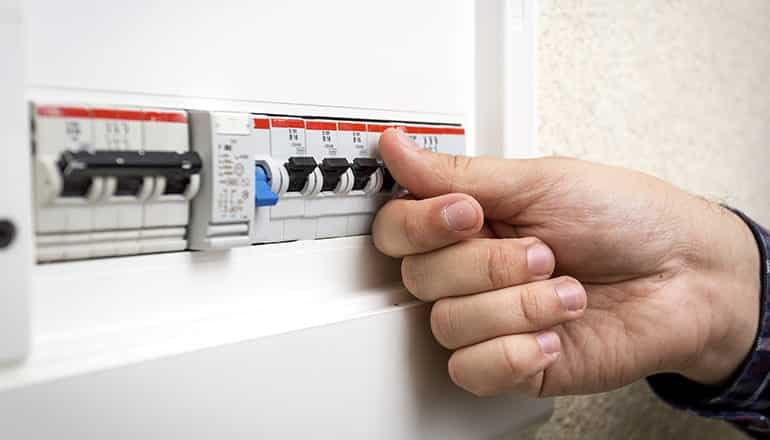
The next thing to do is to connect your junction box to the main electrical panel. You can do this by running some suitable gauge wire from your junction box directly to the panel. Once there, the hot wire (which is usually black or red) needs to be connected to an empty circuit breaker. Then, the white (neutral) wire needs to be connected to the neutral bar. Finally, the green or copper (ground) wire needs to be tied to the ground bar.
When all the wires are securely connected, you’re ready to turn the power back on by flipping the breaker!
The next thing to do is to test your Ring Floodlight Cam. Basically, you can turn on the camera by either moving in front of the motion sensor or by using the app. Be sure to also check that the floodlight works properly – the video feed should look clear, and the motion detection area should work well. If you see that the light doesn’t work, you should do some troubleshooting. This might mean turning off the breaker again and checking your wiring setup.
Once you have checked that the Floodlight Cam is working, you need to organize the wires neatly inside the junction box. The final step is to attach the cover to the electrical box. Make sure you don’t squish any wires or leave any exposed.
Wire Tidy, Prep, and Paint
Once the device is installed and wired up, the integration process isn’t quite over. To ensure a seamless and aesthetic blend with your home’s design, one must pay heed to details like tidying up wires and preparing and painting conduits or cable boxes. Here’s a deeper dive into the post-installation process:
Tidying the Wires
Proper Management: Often, post-installation, homeowners are left with dangling or protruding wires. Not only do these look untidy, but they can also become potential tripping hazards or get damaged due to environmental factors. It’s essential to use wire clips or conduits to ensure that the wires are securely fastened against the walls.
Color Matching: If the wires are visibly contrasting against the backdrop of your home, consider using wire covers that match the color of your walls. Alternatively, you can paint them. This will ensure the wires don’t stand out and ruin the aesthetic appeal of your exteriors.
Prepping and Painting Conduit or Cable Boxes
Choosing the Right Conduit: If you’re using conduit to run the wires, ensure that it’s rated for outdoor use, especially if the Ring Floodlight Cam is exposed to external environmental elements. This will ensure longevity and protection against elements like rain or UV exposure.
Surface Preparation: Before painting any conduit or cable boxes, it’s imperative to ensure the surface is ready. Begin by cleaning the conduit thoroughly to remove any dirt or grime. Once cleaned, lightly sand the surface with a fine-grit sandpaper. This provides a better surface for the paint to adhere to and ensures a smooth finish.
Primer Application: To get the best result, start with a primer, especially if the conduit or cable box is made of metal or PVC. Primers help provide a base for the paint to stick, ensuring that the paint does not peel off easily over time.
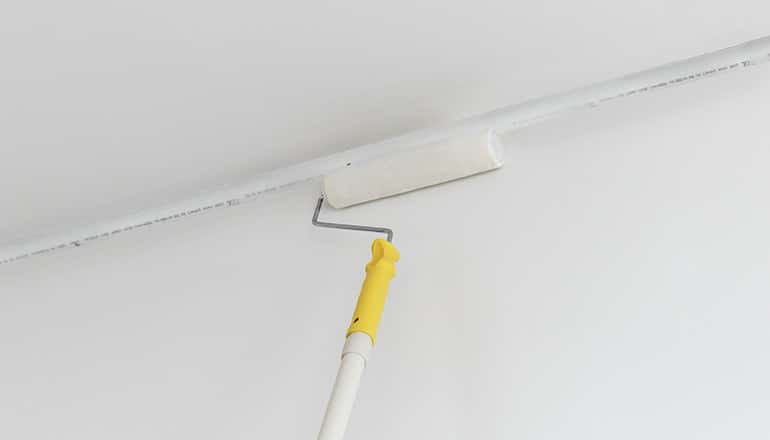
Choosing the Right Paint: Opt for paints that are made specifically for exterior use and are weatherproof. This ensures that the paint will not fade easily and will provide a lasting finish. Moreover, the color of the paint should be carefully chosen to match the backdrop. For many homeowners, this might mean choosing a shade that matches their home’s exterior walls or trim.
Applying the Paint: After the primer has dried, apply the chosen paint in thin, even coats. Two or more coats might be required for a seamless finish. Always allow sufficient drying time between the coats to prevent drips or streaks.
Once the paint has dried, recheck the setup to ensure that all visible wires, conduits, or boxes are concealed and blend in perfectly with the surroundings.
Configuring Your Ring Floodlight Cam in the Ring App
Once you’ve installed your floodlight cam, it’s time to set up and configure it for optimal use. This involves adjusting settings like motion zones within the Ring app. So, let’s jump right into how we can make that happen.
If you haven’t already done so, begin by downloading and installing the Ring app on your device. Once logged in, navigate to “Set Up a Device” and select “Security Cams.” You’ll then be guided through steps such as scanning your device’s QR code (found on its base) and connecting it to Wi-Fi.
You will also name your camera – this helps distinguish between multiple cameras if you have more than one. When prompted, enter a name that makes sense for its location – “Backyard,” “Front Porch,” etc., which are simple but effective identifiers.
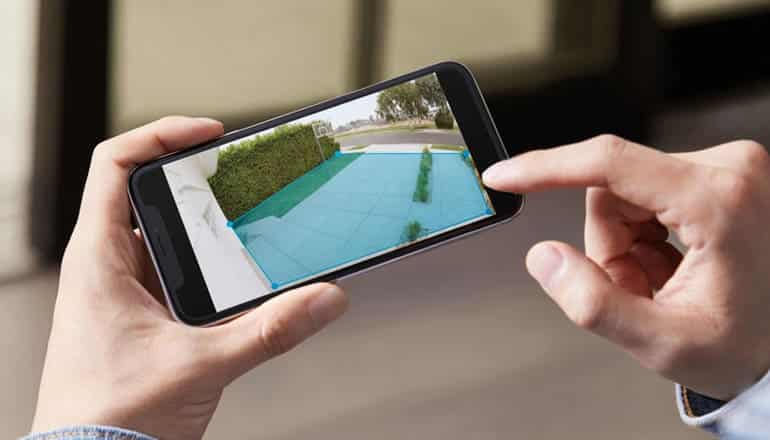
In configuring our new Ring camera, establishing ideal motion zones is critical because these areas trigger alerts when movement is detected. Within the “Motion Settings” menu of the app, tap “Add a Motion Zone.” Here’s where things get fun. On-screen, draw an area by dragging points around; anything moving inside this zone triggers an alert. Do remember, though: smaller zones result in fewer notifications.
Sensitivity levels determine how much movement prompts notification from your floodlight cam, too. Adjusting these levels lets us fine-tune detection capabilities based on personal preference or situational need (like having pets).
A cool feature of using a Ring camera is its ability to control motion detection frequency. This option determines how often your Ring Floodlight Cam will notify you of movement once it has been triggered. Choices range from “Light” (less frequent alerts) to “Frequent” (more regular notifications).
This feature allows for a personalized experience with the device, providing flexibility based on specific needs or circumstances.
Troubleshooting Tips and Safety Precautions During Installation
You may run into problems even if you’ve followed the setup guide carefully. Your camera might not turn on, or it might not work as you expected.
Don’t quickly decide that the camera is broken, as you can use problem-solving steps to figure out what’s wrong. When dealing with wiring for electricity, to reiterate, staying safe is always the most important thing! You should always switch off your power breaker before starting any work to avoid electrocution.
After you’ve turned the power off, have a look at your power breaker. Sometimes, the problem might be because your breaker has tripped. You can attempt to switch the breaker back on. If your camera still doesn’t switch on, there are other things you can look into. Direct your focus to the wiring of the camera next. Get to know the details on how things are connected by looking at the installation guide for your Ring camera. Basically, these guides tend to include diagrams that are easy to understand.
Have a look at the wires during your check to make sure that they’ve been stripped enough. Half an inch is usually enough for a solid connection. Another important check involves looking at the connections that have been wire nuts or connectors you twist on. These might be loose, which is a normal issue, especially if you’ve installed it yourself. You can test how solid your connections are by lightly pulling on each wire. If a wire comes out, take a little time to correct the connection.
After completing all these checks, switch your power breaker back on and check if your camera turns on. If you’re still having problems, it could be that there’s an issue with the external power supply or adapters, especially if your Ring model uses these. Make sure that these parts are properly connected and that they’re working as they should be.
At times, resetting the Ring camera can fix small problems. Some Ring models actually have a button you can use to do this. The user manual can also be of help, especially when it comes to problems specific to your model.
A factor that you might not have thought of is Wi-Fi connectivity. The Ring camera needs to have strong Wi-Fi in order to work correctly. If your camera still doesn’t work after all this, you might want to get in touch with people who are trained to help. You could reach out to customer service for Ring. They can also tell you whether or not the camera is broken. Another choice is to reach out to an electrician who can determine if there are any wiring problems. Seriously, don’t let these camera issues stress you out; there’s always a solution to be found.
Conclusion
I get it; setting up your Ring floodlight cam might seem scary. This is especially true if you’re trying it out without any existing wires. However, following our instructions, you’ve come from being a newbie to a skilled DIY fan. You excelled at choosing the best place for your camera, and connecting the wires was no problem. Hopefully, the job doesn’t freak you out anymore, and now it feels like a strong step toward boosting your home’s security!
By lighting up those dark areas from before, you’re not just offering light; you’re offering extra protection. We really value your thoughts and feelings. If we’ve forgotten something or if you have more questions, then please share your thoughts in the comments! Our goal together is to make every home a safer and smarter place.