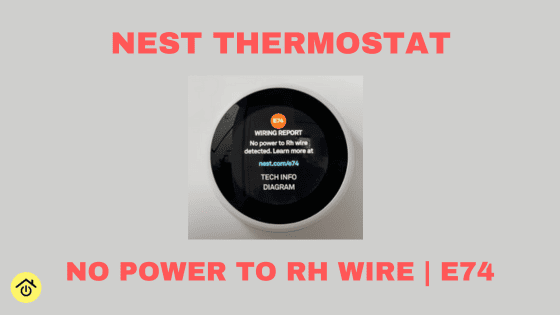
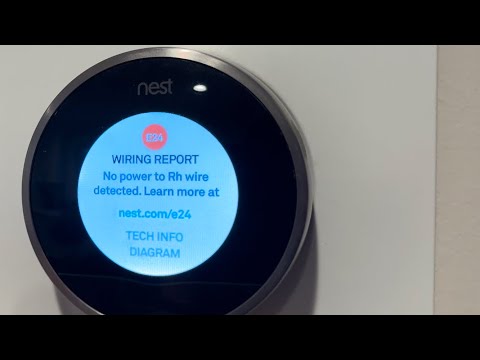
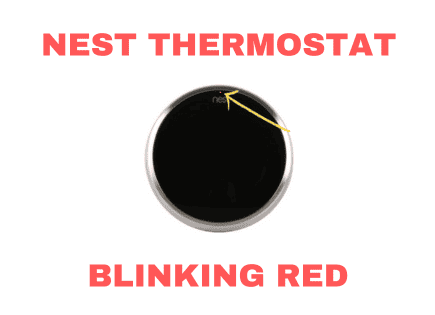
I ran into this issue on a hot summer day when we really needed our AC to be working well. Suddenly, it stopped working and my Nest Thermostat had a message that read “E74 Wiring Report No power to RH Wire detected. Learn more at Nest.com/e74.”
It turns out this is a pretty common issue for Nest Thermostats. It can be a few different issues, so let’s walk through the simplest and most common troubleshooting fixes first.
A common issue with Nest thermostats is an E74 Error Message indicating no power to the RH wire. This problem traces to several possible causes: the circuit breaker may need checking, or the red wire connected incorrectly. The thermostat’s battery might be drained, and alternatively, there might be condensation overflow triggering the float switch. A blown fuse at the HVAC control board, dirty air filters, or a failed transformer in the heating system could also be the root cause. If unresolved, seek professional assistance.
Nest No Power to RH Wire
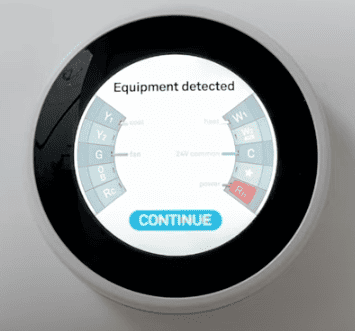
An E74 Error Message No power to RH Wire means that the Nest Thermostat does not detect power from the red RH wire. Without power, the thermostat cannot run the air conditioning, heating, or fan. You’ll need to first check the circuit breaker and confirm the wires are connected properly.
The red RH or RC wire carries power from the HVAC system to the thermostat. One of the other wires, typically yellow, white, or green, carries power back to the HVAC to close the loop and starts the cooling, heating, or fan.
If the red wire is not receiving any power from the HVAC system, it can not send any power back to start the systems.
These options will also work for a Nest E4 error message (1st generation Nest Learning Thermostat) or a Nest E24 error message (2nd generation Nest Learning Thermostat).
Option 1: Check the Circuit Breaker
Go to your circuit breaker at the breaker box to be sure the breaker hasn’t tripped.
If the breaker tripped, you can simply switch it back on. You might have to pull it in the opposite direction before switching it back on.
If it hasn’t tripped, try turning it off and on again. Sometimes, a quick reset was all that was needed.
You can check if this worked at the Nest Thermostat to see if it powered back up and is now working. If not, the next easiest check is to confirm the wiring is properly connected.
SAFETY NOTE: Always turn the power off at the breaker to ensure no power is running through the wires. The red wire is a HOT wire, meaning there is a chance of electrocution.
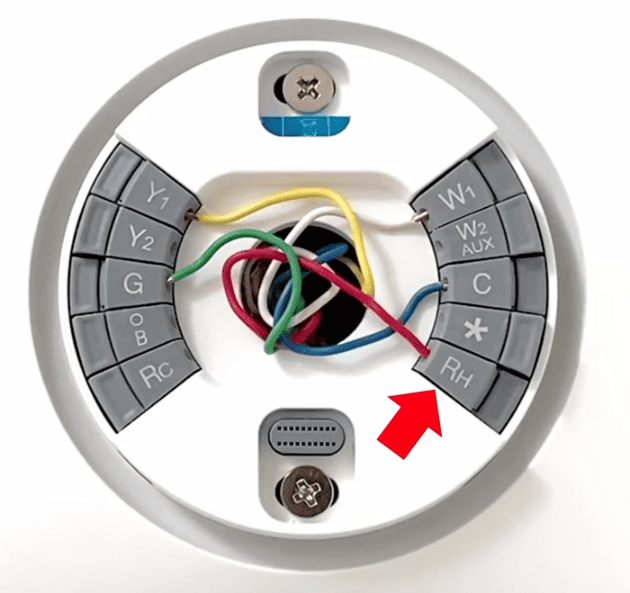
Option 2: Check that the Red Wire is Connected Correctly
Sometimes, the wiring was not totally secure when installed and over time, something came loose.
Remove the Nest Thermostat and check the wiring. See if anything is not secure, loose, or damaged.
Check each wire, but pay special attention to the RH wire connection. Make sure each wire is fully inserted and not loose.
The connector button should be pushed down if the wires have been inserted correctly.
To insert the wire, press down on the connector. Again, if it was inserted correctly, it will stay down.
If the wiring looks good, move on to the next option.
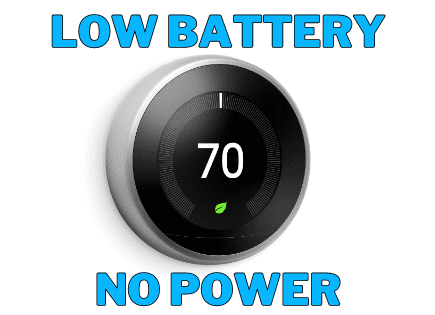
Option 3: Check the Thermostat Battery
Depending on your wiring setup, your Nest might run out of battery power and won’t turn on.
If you have a wire (typically blue) connected to the C, then you don’t have to worry about this step.
Without the C or common wire, your Nest Thermostat will eventually run out of power. It needs to have continuous power to keep the internal battery powered effectively.
I’ve written about this in depth because a more common Nest Thermostat issue is a low battery. You can follow the instructions to charge your thermostat for a short-term fix or you can opt for one of several ways to add the C wire.
In the long run, adding a C wire will reduce the number of issues you have with your thermostat.
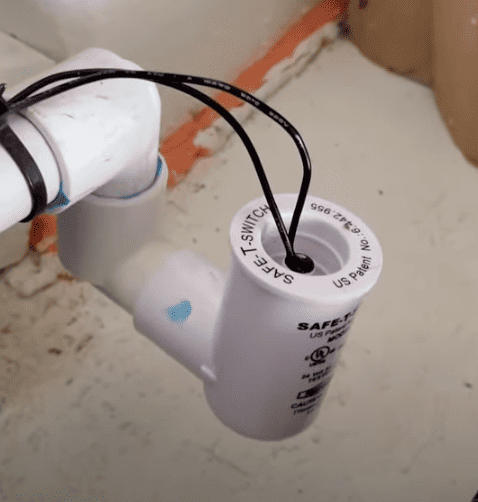
Air conditioning units create condensation and that condensation needs to flow out of your home. If it can’t, the system will shut off automatically to protect itself.
Most systems have an HVAC float switch. If there is a clog and water cannot flow out, the float switch will trigger, turning the system off.
It works exactly as it sounds. It floats and switches the system off so that there is no overflow that leads to flooding in your home.
Step 1: At the air handler, look for the float switch. If you find enough water that has made it float, you likely have a clog.
Step 2: Check the drain pan. If you find water sitting in the pan, that confirms the clog. You might need to remove a panel to see the drain pan.
Each HVAC system is different, so it may be helpful to Google your cooling system’s make and model if you aren’t sure what the float switch looks like.
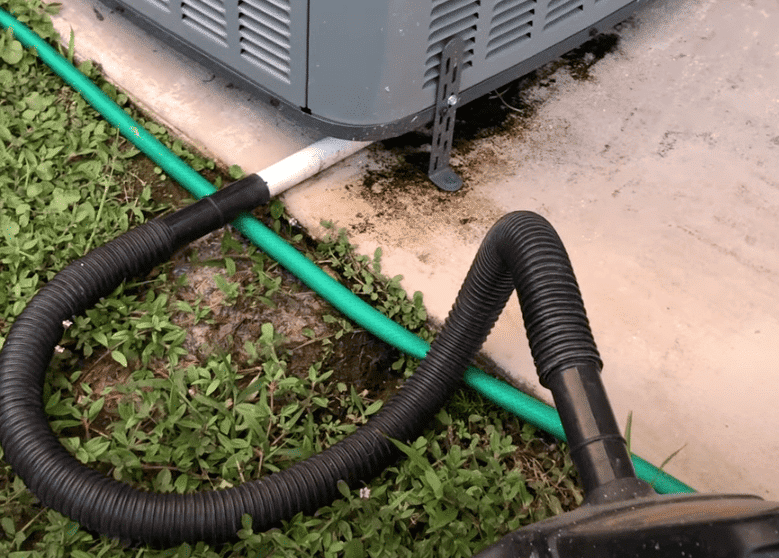
How to remove a clog in your system:
Go outside to the drainage pipe
Attach the end of a dry vac or shop vac to the end of the drain pipe
Turn the dry vac on and suck out anything that could be clogged in the drain lines
Next, go back to the air handler unit
Remove any water that overflowed into the float switch
If your drain lines are clear and your float switch is not floating, then let’s check to see if you have a blown fuse/
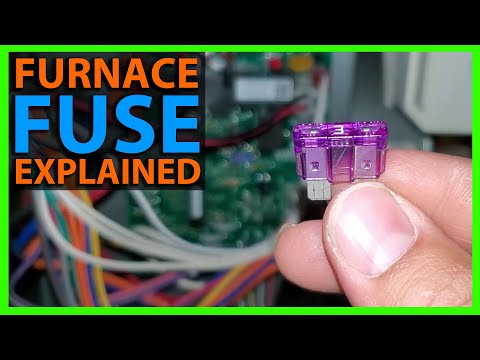
Option 5: Blown Fuse at HVAC Control Board
This fix is a bit more complicated and a little intimidating compared to the others. But with a little bit of help, this can actually be a really simple fix.
A blown fuse is a common problem for many electrical issues and doesn’t have to cost much to fix. Simply replace the fuse with one that you can buy at any local hardware store or even Amazon.
If your HVAC control unit fuse blows, then the system won’t have any power running through it. That will cause the Nest E74 issue.
Here’s a detailed video on how to replace the fuse.
Both this fix and/or cleaning out your drainage pipe should have done the trick. If not, there are a few other possibilities.
Option 6: Replace your Air Filters
Good airflow is essential to the function of your AC unit. Air conditioning coils can freeze if there isn’t enough airflow, which could be the cause of your Nest no power to RH wire.
You can check this visually at the air handler unit when you opened it up. You should be able to see the coils and you’ll definitely see if they are frozen.
Be sure to inspect the air handler unit for any other damage or leaks. If you see anything, you’ll need to contact an HVAC professional.
If it looks like your coils are frozen, you’ll need to wait for them to thaw out.
Be sure to replace the filter if it is dirty and any other filters in your system. This needs to be done occasionally anyway.
Option 7: Failed Transformer in your Heating System
If you were trying to heat your home and your Nest Thermostat had the no power to RH wire error message, then you could have a failed transformer.
The video below is helpful in understanding and potentially fixing a failed transformer.
This fix is likely reserved for the more advanced handyman or a professional.
Contact a Local HVAC Professional
At this point, if you are unable to fix your issue, it is probably time to call a professional. They should be able to find the root cause of the E74 no power to RH wire issue to fix it.
Conclusion
It can be very frustrating to have a Nest Thermostat that has an error message come across the screen. If you are facing the Nest.com/e74 no power to RH wire or no power to RC wire, there are several fixes you can try.
Check the Circuit Breaker
Check that the Red Wire and the other wires are Connected Correctly
Check the Thermostat Battery
Condensation Overflow & Float Switch Triggered
Blown Fuse at HVAC Control Board
Replace your Air Filters
Failed Transformer in your Heating System
If you’ve gone through all of these steps and you are still seeing the E74 error message, then it’s time to contact a local HVAC professional.
Let us know what worked for you and thanks for reading!
Tom DeKoek, the lead strategist at Good Home Automation, possesses over a decade of expertise in technology and smart home. With a genuine knack for tech and an extensive history of troubleshooting, Tom has emerged as a trusted authority in home automation. Serving millions annually, Good Home Automation, under his guidance, provides precise, actionable advice, ensuring users overcome tech hitches and enjoy their devices to the fullest. Connect with Tom on LinkedIn