Nest Thermostat Battery (Can it be replaced?)
If you’re wondering if your Nest Thermostat has a battery, the answer is yes. But, the more important question is what type of battery.
Depending on the model of your Nest Thermostat, you’ll either have replaceable AAA batteries or an internal rechargeable battery. Your first step is to figure out which Nest Thermostat model you own and it can be a bit confusing.
Which Nest Thermostat do I have?
The naming of Nest Thermostats can be a bit confusing. There is the Nest Thermostat, Nest Learning Thermostat, and Nest Thermostat E. You might even be confused about whether this is a Nest product or a Google product.
First of all, Google purchased Nest in 2014 for $3.2 billion. Nest was branded separately until 2019, when Google folded Nest into a newly created division called Google Nest.
So yes, Google and Nest are essentially the same, but the branding can sometimes be confusing.
Nest Learning Thermostat
This is the original Nest Thermostat and was launched in 2011. It is currently in its 3rd generation, which launched in 2015.
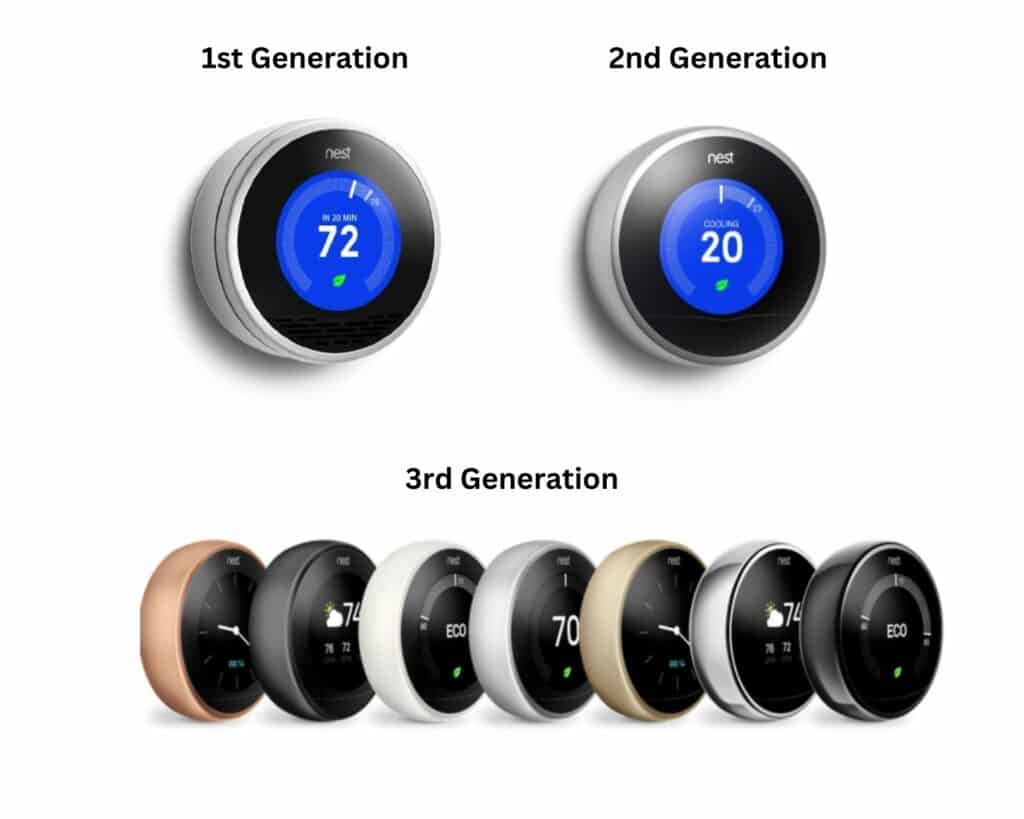
This model comes with the highest price tag and has the most features.
All 3 generations have an internal rechargeable battery. The battery is not meant to be replaced and should not need to be replaced.
If this is the model you have and you are having power issues, skip down to this section for additional information.
Nest Thermostat E
The Nest Thermostat E was the original lower-cost model that Google Nest launched back in 2017. Compared to the Learning Thermostat, it is a slimmed-down version made with plastic instead of stainless steel and has fewer features.
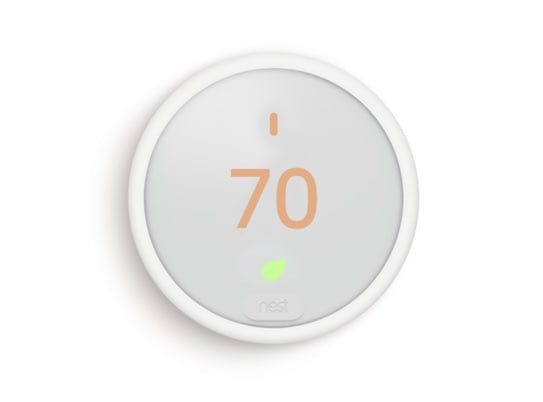
Like the Learning Thermostat, the Thermostat E has an internal rechargeable battery. The battery is not meant to be replaced and should not need to be replaced.
It has since been discontinued and replaced, but any power issue fix for this model is the same as the Nest Learning Thermostat. You can skip down to this section for additional information.
Nest Thermostat
This is the latest Nest Thermostat model to be launched and replaced the Thermostat E as the budget Nest thermostat in 2020.
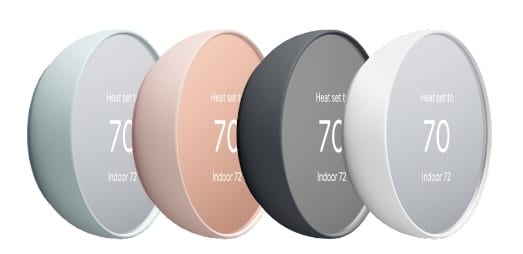
The biggest feature changes for this thermostat are that it does not have any learning features and does not have the rotating ring all prior models had.
This thermostat uses 2 standard 1.5 V AAA alkaline batteries and will need to be replaced at some point. You will receive a notification on the thermostat and in the Google Home app when the battery level is getting low.
Follow these steps to replace the Nest batteries:
- Remove the thermostat from the wall plate
- Remove both old batteries from the thermostat
- Replace the batteries with two new AAA alkaline batteries
- Reattach the thermostat to the wall plate and make sure you hear it click
Even though this thermostat has batteries, I would still recommend a common or C wire connection. Keep reading for more details.
Why do the Nest Learning Thermostat and Nest Thermostat E often have power issues?
Most power issues for smart thermostats can be traced back to a missing C wire or common wire.
Smart thermostats need a constant flow of power to support their smart features. Since many homes and HVAC systems were built and installed before smart thermostats, they only have a 4-wire thermostat wire to accommodate a standard thermostat.
Newer homes or recently renovated homes are more likely to include a 5-wire thermostat wire which includes the C wire.
Although Google Nest claims its thermostats do not need a C wire, it is likely that without one, you’ll run into power issues. This has been the case for many owners after a few years with the thermostat, which can be really confusing and frustrating.
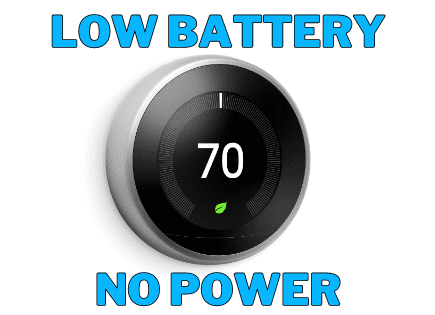
What can you do about Low Battery issues or other performance issues?
If you are constantly facing battery or power issues, you are likely missing a C wire. I’ve written articles specifically for the Low Battery message or when your Nest Thermostat is not turning on.
The long-term solution is to add that constant flow of power to your thermostat by adding a C wire or installing the Google Nest Power Protector.
In the short term, you can get the thermostat powered up by charging the internal battery directly using the USB port on the back of the thermostat.
For the 2nd and 3rd generation Nest Learning Thermostat or the Nest Thermostat E, use a micro-USB cable.
For the 1st generation Nest Learning Thermostat, use a mini-USB cable.
How can you check the power Levels of your Nest Thermostat?
The first thing to do is check your power levels on the device. If your device has no power, skip this step for now. You can return to this step later to confirm your fix worked.
For the Nest Learning Thermostat or Nest Thermostat E:
- Click down on your Nest Thermostat.
- Turn and scroll to the gear icon. It will say “Settings” in the middle of the device once you’ve reached the gear. Click on the settings icon.
- Scroll to the right towards the end to “Technical Info” and select.
- Select “Power.” It should be the top option.
- You should now see four metrics: Battery, Voc, Vin, and lin.
The metric we’ll focus on is Battery. The battery should be greater than 3.7V (volts).

This is the voltage of the device’s internal rechargeable battery. If the device does not receive enough power to recharge the battery, it will shut off certain features to conserve power, like Wi-Fi or the display screen. That’s when you’ll get a low battery message or no power.
Below 3.6V, the thermostat could be out of battery and have a blank screen.
Another important metric is lin which is measured in milliAmps. The lin should be greater than 20.
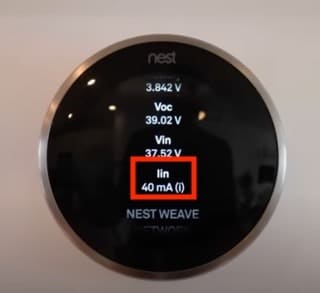
If lin is at or below 20, you could face some of the same issues even if your battery appears to be charged.
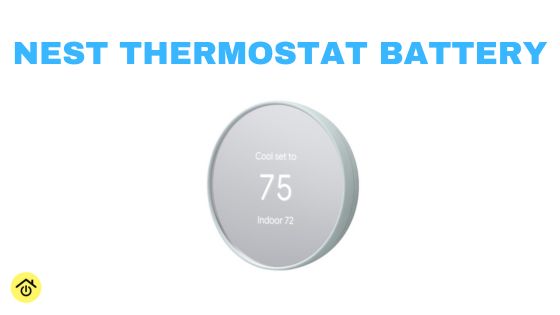
For the Nest Thermostat:
- Open the Menu View
- Select Settings
- Select Battery
The icon will change based on the level of battery charge. If it has a Low battery warning, then replace the batteries right away.
How to check the wiring of your Nest Thermostat?
Next, let’s check your wiring.
If your Nest Thermostat has no power, skip down to option 2.
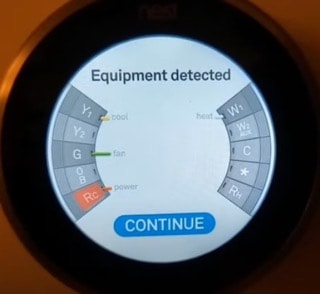
Option 1: Use the display screen
1. Go back to the “Settings” section by scrolling to the gear icon.
2. Scroll to the right towards the end to “Equipment” and select.
3. The screen should now display how the Nest is wired.
Option 2: Pull the Nest off the wall to look at the physical wiring
Gently pull the Nest off the wall. It should come right off. Now you can see the physical wiring.
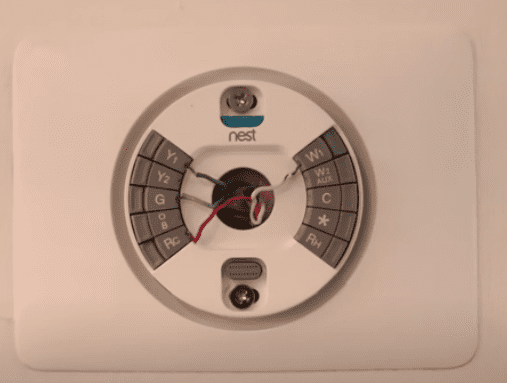
You will likely have 3-5 wires connected to your Nest. Below you will find a breakdown of each and its purpose.
| Wire Color/ Name | Where the Wire Connects to the Thermostat | Purpose of the Wire |
|---|---|---|
| Red Wire (R wire) | Connected to Rc or Rh | This is the power wire (NOT continuous like the C wire) |
| Yellow Wire (Y wire) | Connected to Y1 | This is your cooling (air conditioning) |
| Green Wire (G wire) | Connected to G | This is the fan |
| White wire (W wire) | Connected to W1 | This is your heating |
| Blue wire (C wire) | Connected to the C | This is the Common wire that supplies your smart thermostat with continuous power |
Understanding the wiring of your thermostat will help you determine if there is an issue and how to fix it.
Conclusion
All Nest Thermostats have batteries. Certain models are meant to be easily changed, while others are meant to recharge during normal operation.
Figuring out which model you own is an important first step to troubleshooting any battery issue.
Most battery issues can be resolved by having a continuous power source for the Learning Thermostat or Thermostat E through a C wire or common wire.
If you have the Nest Thermostat swapping out the AAA batteries will do the trick.
Thanks for reading and good luck!