Yellow Light on Garage Door Sensor (EASY Fix!)

If your garage door won’t close and your garage door sensor is showing a yellow light, don’t panic, this is a very common problem. Luckily there is an easy fix for it and it should only take about a minute or two.
How to fix yellow light on garage door sensor
A yellow light on your garage door sensor indicates that your safety reverse sensors are out of alignment. Your garage door will not close until they are fixed. Start by cleaning the lenses on both sensors and then adjust each sensor so that they line up perfectly with one-another.
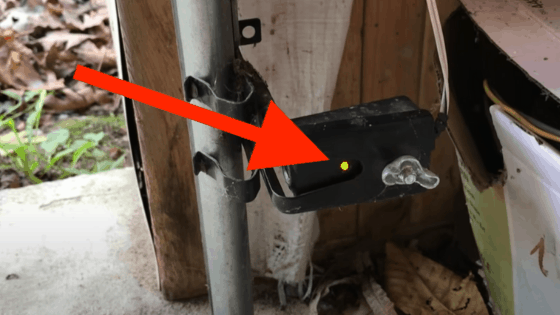
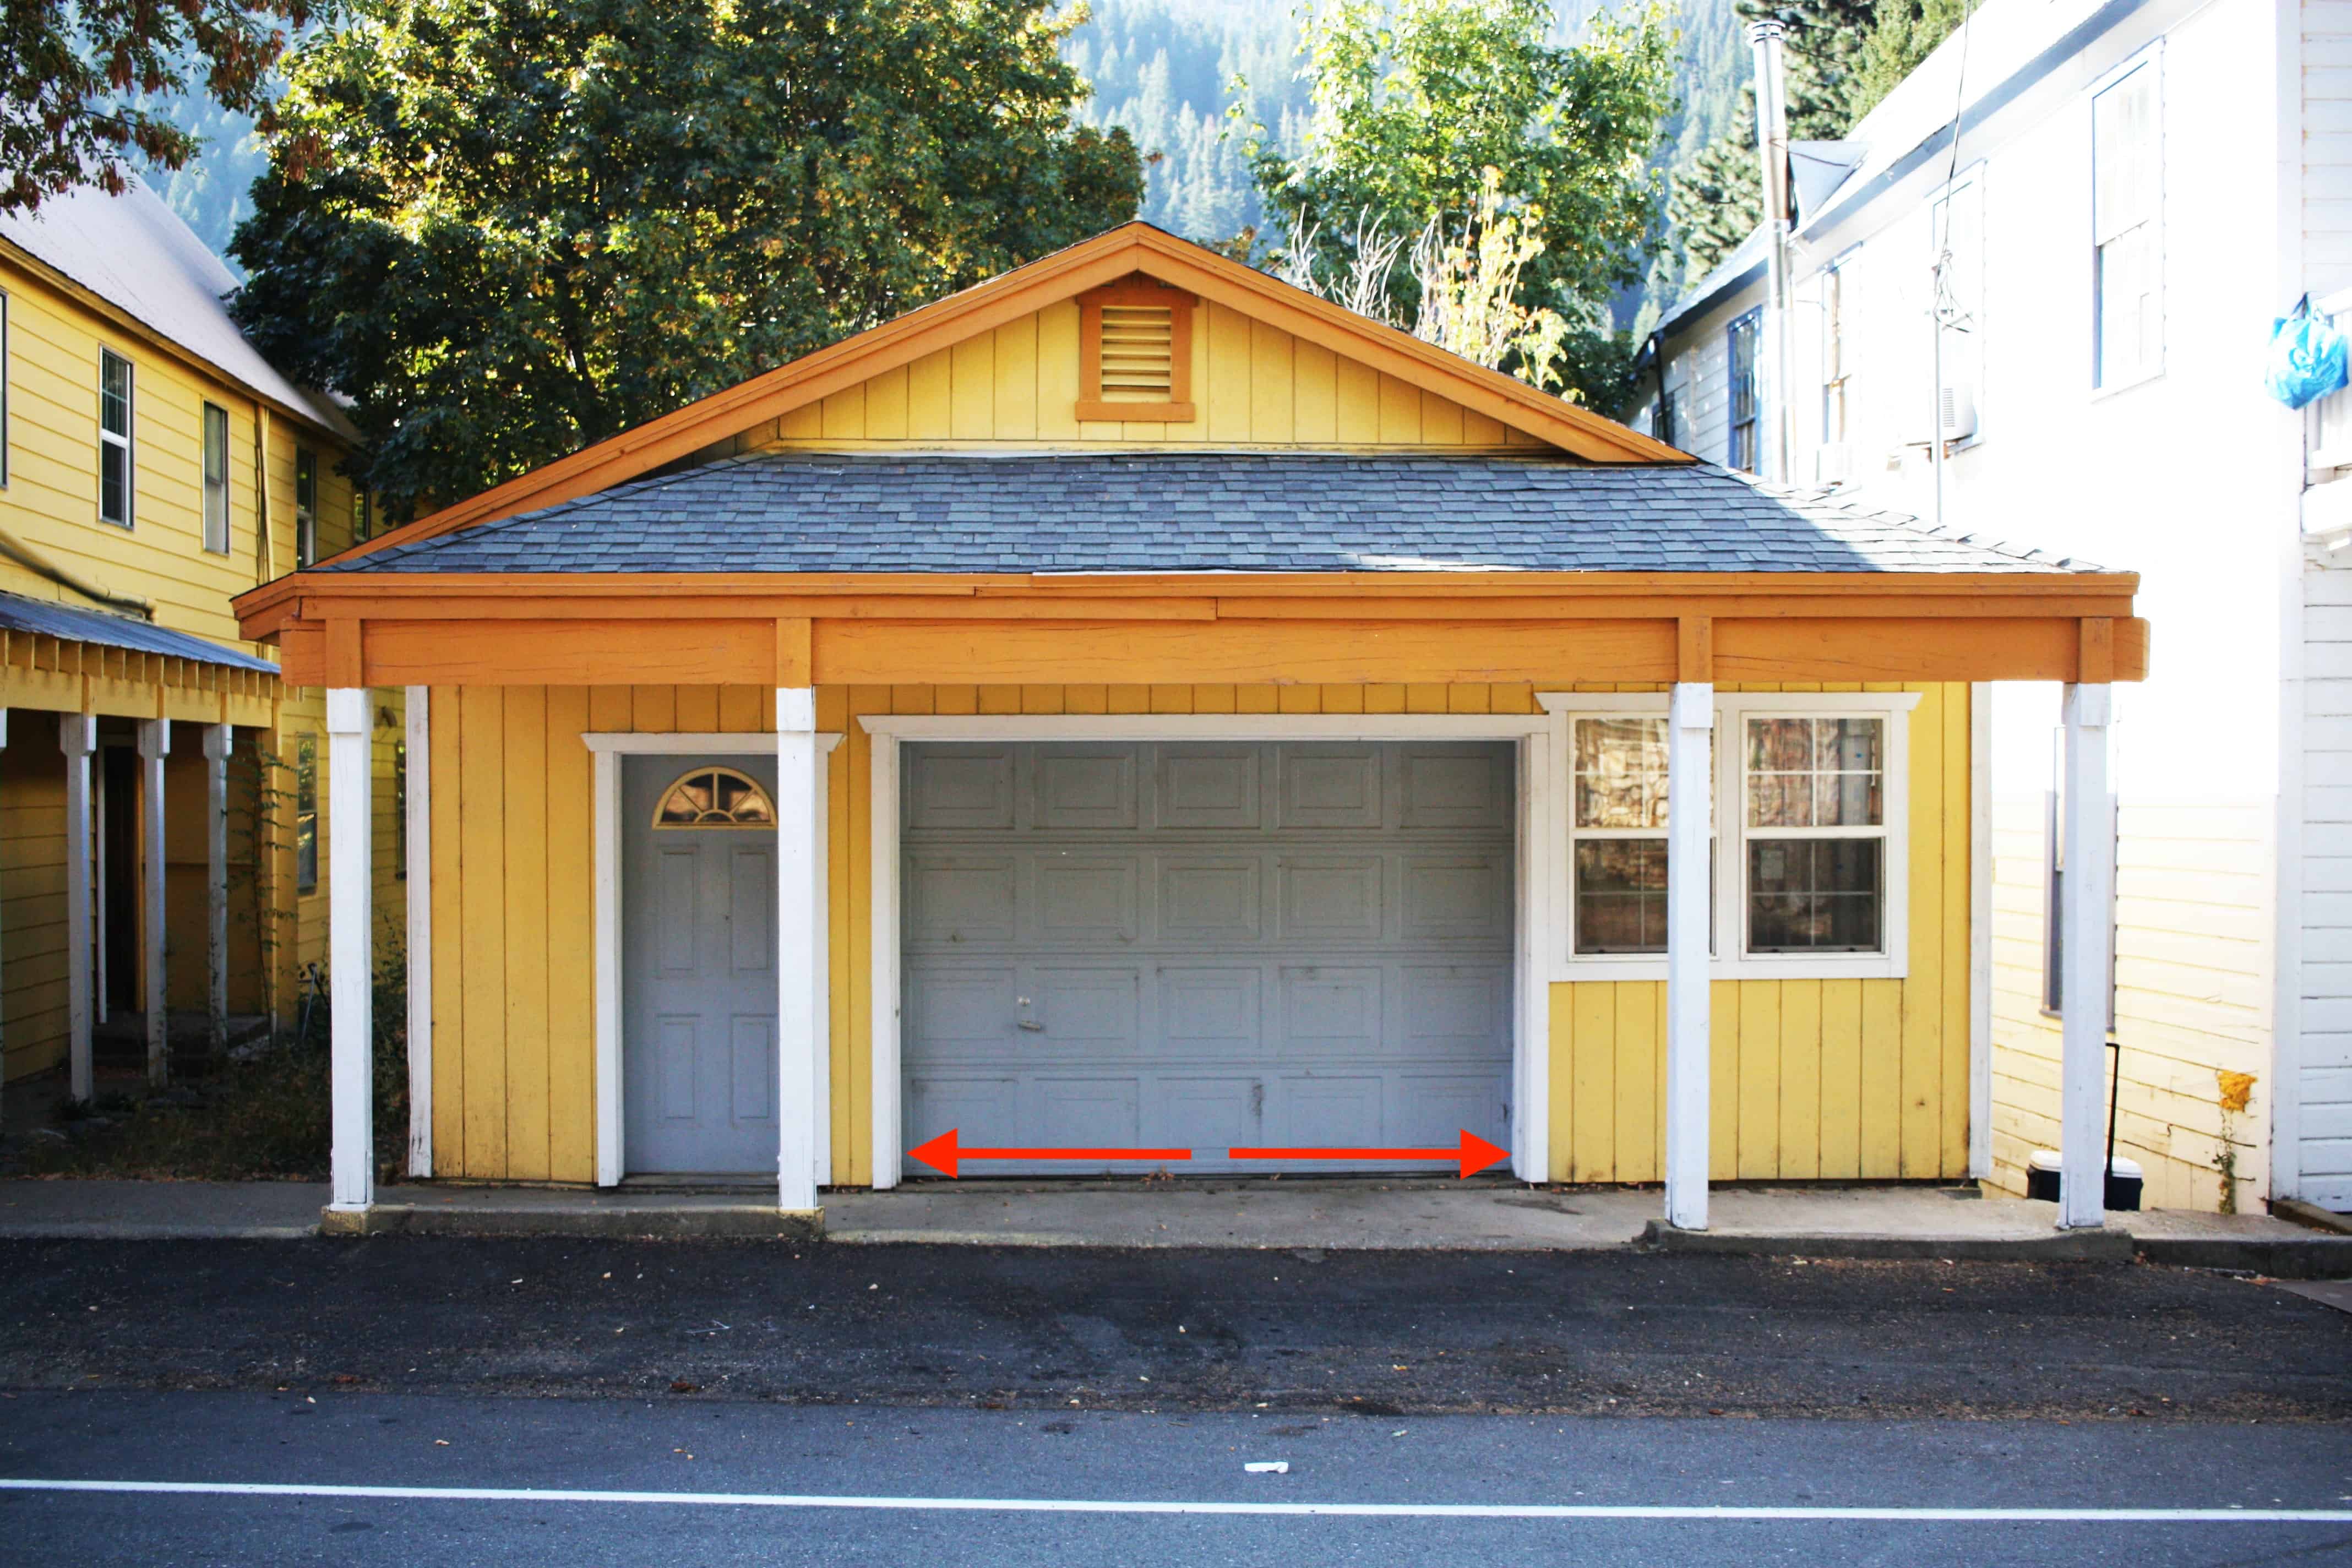
Your garage door sensors are most often found a few inches off of the ground, one on each side of your garage door.
These sensors use something called a “photo-eye” system. Simply put, they shoot an invisible, infrared beam from side of your garage door to the other.
When you press the remote control that closes your garage door, a signal is sent to these sensors. Their primary purpose is to prevent your garage door from closing on something, or someone.
Your garage door only opens if the invisible infrared beam running across your garage door remains uninterrupted. But occasionally these sensors malfunction.
The key signs of a malfunctioning sensor is of course the yellow sensor light and the garage door not closing, or attempting to close and then quickly opening again. Followed by a flashing light from your overhead control box.
Clean dirty lenses
The first thing to do when you see a yellow light on your garage door sensor is to clean off the lens.
Since these sensors are so close to the ground in your garage, they are exposed to all kinds of dirt, grime and cobwebs.
The easiest thing to do is to just wet a paper-towel with a little bit of water and thoroughly wash the lens directly.
You can even use a mild cleaner like Windex or something similar that won’t leave any streaks behind.
Just try not to get the lens too wet.
And while you’re at it, go ahead and clean the sensor on the other side of the garage door too for good measure.
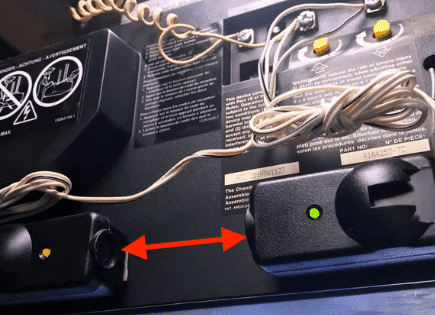
Realign sensors
Misaligned garage door sensors are the most likely culprit for why you’re seeing the yellow LED light and why your garage door won’t close.
Both sensors need to be pointed in the same direction at one another, and at the same exact angle.
You can use a screwdriver to loosen the bracket that holds the sensor in place. Once you have it loose, go ahead and position it precisely the way you want.
When the sensor is in the correct position, tighten the bracket back up and lock the sensor in place.
If you don’t have a screwdriver handy, you might still be able to adjust the sensor slightly by applying some force to it.
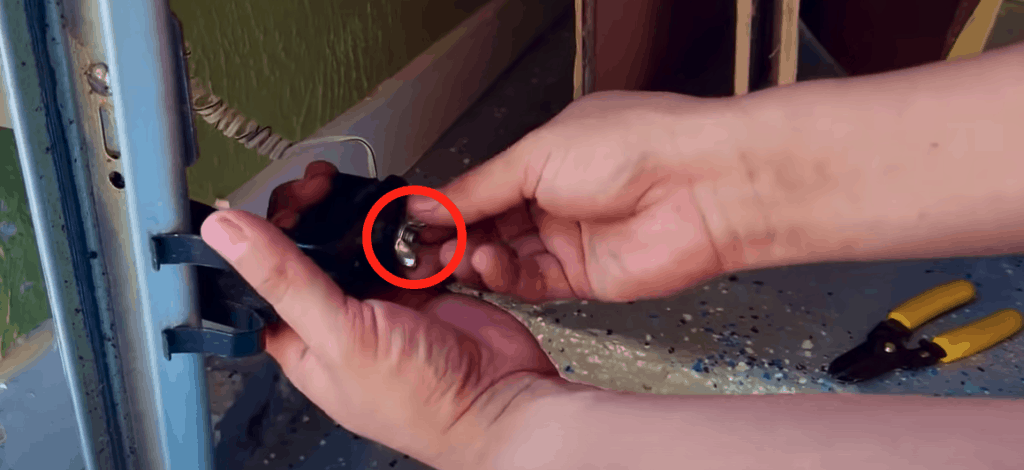
Some models actually just have a wing-nut holding each sensor in place. In that case just use your hands to loosen and tighten this nut.
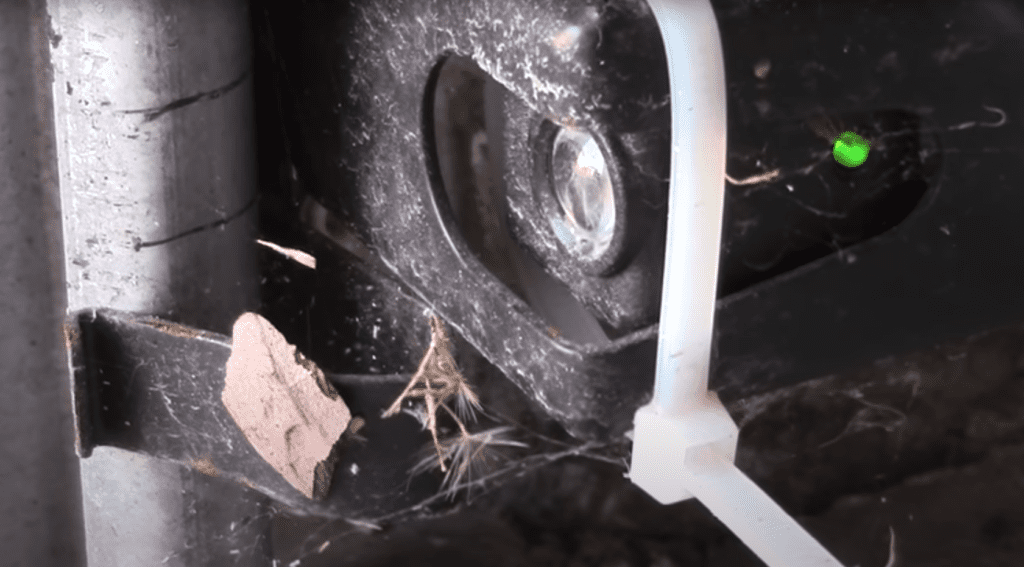
PRO TIP: Use a zip-tie to help secure your sensor into place. The repeated vibrations from your garage door tend to move the sensor out of position over time. The zip-tie helps prevent that from happening.
Once you think you have both sensors lined up perfectly with one another, go ahead and try to close the garage door.
If it still doesn’t work, read on.
Reconnect or replace sensor wires
If cleaning the lenses on each garage door sensor and realigning them didn’t do the trick, then you should look carefully at each individual sensor wire.
You’re looking for any signs of fraying or damage to these wires. Also just confirm that they are all connected correctly and snuggly.
Occasionally these wires can get pulled out or worn down over time and this can cause a short in your garage door system.

Unless you’re really handy, if you’re seeing these signs of damage to the wiring I would call a professional to handle the repair.
It can be pretty dangerous dealing with electricity and wiring. Some things are worth paying for.
A professional will have all the right tools for the job and be able to evaluate exactly what the problem is and how to fix much quicker and safer than you could.
Move objects out of the way
Another possible cause for your malfunctioning garage door sensor is that something is getting in the way.
As mentioned, anything that obstructs the infrared beam running between the two sensors will cause the garage door to act up.
Sometimes this is obvious, like a ball or a bike that is clearly blocking the way.
Other-times it’s less obvious. It could be a bookshelf or a tool box that is set beside the sensor that appears to be out of the way but in fact isn’t.
If you’re still having issues with your sensors I would take the extra precaution of moving anything and everything remotely near each sensor.
Just clear anything within one foot of each sensor away and then try closing your garage door again. See if that fixes it.
Call support
Obviously this will depend on the garage door open brand that you own but if you’ve hit a dead end and your garage door is still broken, I would give the experts a call.
You can almost always find the support number for your opener printed on the overhead control box. You might need to open it up to expose the number.
Alternatively you can just type the brand name of your opener into Google followed by “support” and find the number that way.
Replace your old sensors
If you’re still seeing the yellow light on your garage door sensor even after cleaning the lenses, realigning them, reconnecting/replacing sensor wiring, moving objects out of the way AND contacting support, then it’s time to buy new sensors.
There are countless possible reasons your old sensors stopped working – time, overuse, exposure to harsh weather, etc. Regardless of the reason, your old sensors need to be replaced.
To start, go online, or to your nearest home improvement store and buy a replacement pair. Make sure the new sensors are compatible with your model garage door opener.
Once you have your new, compatible garage door sensors, you’ll need to install them. To install your new sensors, follow these steps.
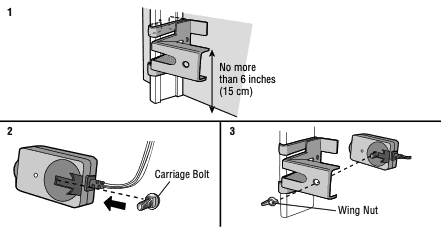
Door track installation:
- Slide the curved arms of the sensor bracket around the edge of the door track. Snap into place so that the sensor bracket is flush against the track.
- Slide the carriage blot into the slot on each sensor.
- Insert the bolt through the hold in the sensor bracket and attach with the wing nut. The lenses on both sensors should point toward each other. Make sure the lens is not obstructed by the sensor bracket.
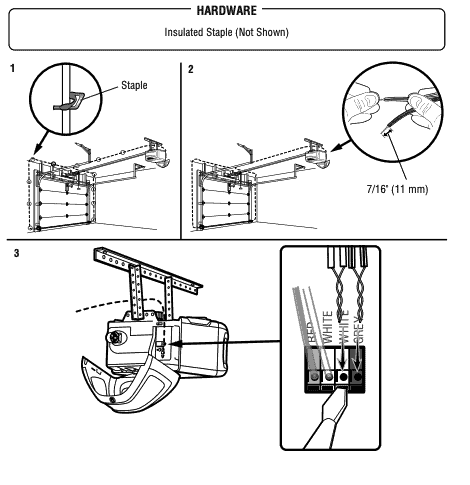
Installation without pre-wiring:
- Run the wire from both sensors to the garage door opener. Attach the wire to the wall and ceiling with the staples.
- Strip 7/16inch (11mm) of insulation from each set of wires. Separate the wires. Twist the white wires together. Twist the white/black wires together.
- Insert the white wires into the white terminal on the garage door opener. Insert the white/black wires into the grey terminal on the garage door opener. To insert or remove the wires from the terminal, push in the tab with a screwdriver tip.
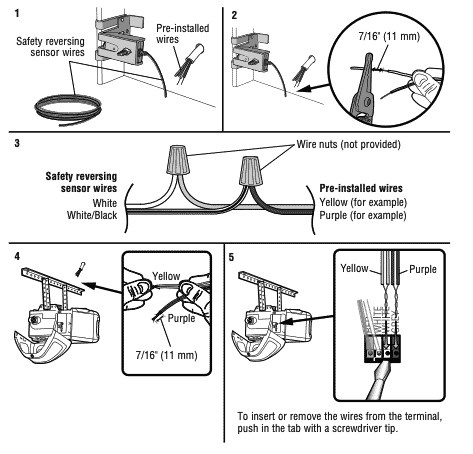
Pre-wired installation:
- Cut the end of the safety reversing sensor wire. Make sure there is enough wire to reach the pre-installed wires from the wall.
- Separate the safety reversing sensor wires and strip 7/16inch (11mm) of insulation from each end. Choose two of the pre-installed wires and strip 7/16inch (11mm) of insulation from each end. Make sure that you choose the same color pre-installed wires for each sensor.
- Connect the pre-installed wires to the sensor wires with wire nuts making sure the colors correspond for each sensor. For example, the white wire would connect to the yellow wire and the white/black wire would connect to the purple wire.
- At the garage door opener, strip 7/16inch (11mm) of insulation from each end of the wires previously chosen for the safety reversing sensors. Twist the like-colored wires together.
- Insert the wires connected to the white safety sensor wires to the white terminal on the garage door opener. Insert the wires that are connected to the white/black safety sensor wires to the grey terminal on the garage door opener.
Conclusion
If you’re seeing a yellow light on one or both of your garage door sensors, don’t worry, this is extremely common.
The easiest way to fix this is to clean the lenses on both sensors and then make sure that they are perfectly aligned with one another.
They should be the same height off the ground and at the same angle, pointed directly at each other.
If that doesn’t solve your problem then you should closely inspect the wires coming out of each sensor.
Confirm that these wires are not damaged, frayed or disconnected in any way. Sometimes they can get accidentally pulled out or ripped.
Finally, move anything and everything that is within one foot of each sensor out of the away. Occasionally these items can interrupt or obstruct the infrared beam running between the two sensors, causing them to malfunction.
Hopefully you found this helpful and one of these troubleshooting steps fixed your problem. If not, go ahead and track down the number to support and give the experts a call.
If all else fails, you might need to buy a new pair of garage door sensors.
What did you do to fix the yellow light on your garage door sensor? Leave me a comment down below.