Nest Blinking Green Light (What does it mean?)
If your Nest Thermostat has a blinking green light at the top of the device, this means it is updating the software.
Any smart thermostat like the Nest requires frequent software updates to keep the device updated. Google is frequently improving its products and patching any security flaws.
If your thermostat has been flashing green for more than 15 minutes, you could have an issue that requires a fix.
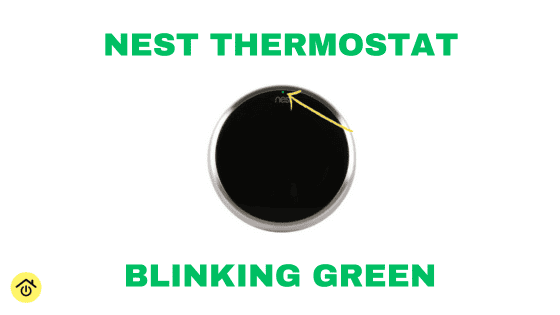
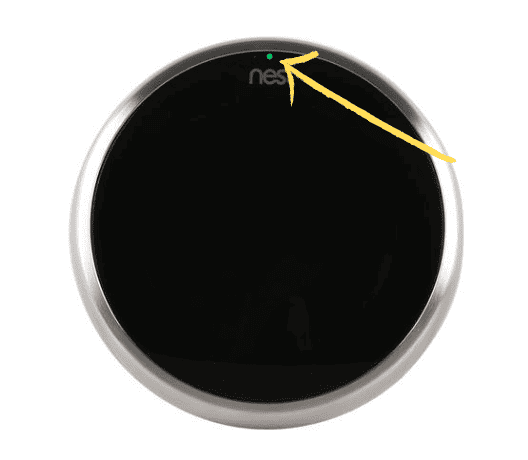
Nest Thermostat Blinking Green Light
If your Nest Thermostat has a blinking green light, it is updating the software. This typically takes just a couple of minutes but could take as much as 15 minutes. If the green light blinks for more than 15 minutes, your device is likely frozen and will need to be restarted.
Fix #1: Restart your Nest Thermostat
The first way to troubleshoot a Nest Thermostat that froze during a software update is a soft reboot or reboot.
I would recommend first confirming which Nest Thermostat you own. There are different troubleshooting steps for each model of the Google Nest Thermostat.
There are two options to unfreeze and restart your Nest Thermostat:
Option 1: Restart the Nest Thermostat
For the Nest Learning Thermostat or Thermostat E, follow these directions:
- Click and hold the center button for 10 seconds until the screen shuts down, then release it.
- Click and release the display again. It should now restart.
Since your screen is likely already off, hold it for longer than 10 seconds.
It may have to download the update again but it should then restart without a problem.
For the Nest Thermostat, follow these directions:
- Pull the thermostat off the base
- Remove the batteries from the battery compartment
- Replace both AAA batteries with new batteries or, if you don’t have any, a set that you know is working
- Reattach the thermostat to the base and allow it to restart
Option 2: Remove the display from the base and replace it
- Gently pull the display off the base
- Reconnect the display to the base
This will force the device to restart. It may have to download the update again but it should then restart without a problem.
Make sure the thermostat is properly connected to the base. Sometimes these thermostats will have power issues because they are not properly seated on the base.
Fix #2: Check your Wi-Fi Connection and Signal Strength
Nest Thermostats rely on stable Wi-Fi and the internet to connect to the Google Home app or Google Nest App. If it doesn’t have a stable connection, you will run into multiple issues, including trouble with firmware updates.
Check your Wi-Fi Connection
Check if you are having Wi-Fi connection issues in other parts of your home, but most importantly, next to your thermostat.
Standing next to the thermostat, do a speed test on your phone or laptop to check the speed of your internet connection. This will give you an idea of any other issues going on.
If your Wi-Fi seems slow, power-cycle your router and modem. It’s good practice to do this occasionally anyway.
Check your Signal Strength
Having a strong Wi-Fi signal is important for any device that relies on it. The more obstacles in the way and distance from the router, the worse your signal strength will get.
Consider any other devices that could be interfering or concrete walls that separate the device from the router.
You can use a Wi-Fi speed test in different parts of your home to see if you have any dead spots. Your Nest Thermostat might just be in the wrong place.
Fix #3: Charge your Thermostat using the USB port
If you pulled your Nest off the wall, you might have noticed a USB port on the back.
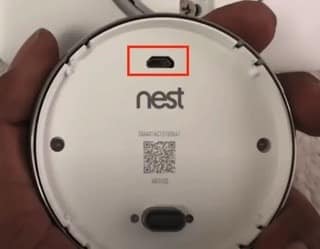
If your Thermostat is blank with a flashing green light, you can use this port to charge the device. You can also move it closer to your Wi-Fi router to ensure it has a good signal.
As it’s charging, it should update the software. If that doesn’t fix the issue, charging it should give the thermostat the energy to power the screen.
For the 2nd & 3rd generation Nest Learning Thermostat or the Nest Thermostat E, use a micro-USB cable.
If you don’t have a micro-USB or don’t know what they look like, here’s one from Amazon.
For the 1st generation Nest Learning Thermostat, use a mini-USB cable.
This is not applicable to the Nest Thermostat (the latest model to be released)
Here are the steps to charge using the USB Port:
- Pull your Thermostat off the wall.
- Plug the charger into the Nest. Then, plug the other end into a USB wall charger. Do not use a computer or USB port from another device.
- You might see a blinking red light. This confirms it is charging.
- Charging could take several minutes or up to an hour. If it takes longer than an hour, you might have another issue.
- Once the device has enough charge, the display screen will light up with a message to reconnect to the base. Reconnect it to the wall base to complete the fix.
Once the device charges enough and you’ve put it back on the base, go to the next fix to check the power levels. It might point to a bigger issue.
Fix #4: Check the Power Levels
When your Nest Thermostat does not finish a software update or freezes, it’s worth it to check the power readings. This could be the reason why your stuck with Nest blinking green light.
You’ll only be able to do this if you have power and your thermostat is not blank.
Follow these instructions to check the power.
- Click down on your Nest Thermostat.
- Turn and scroll to the gear icon. It will say Settings in the middle of the device once you’ve reached the gear. Click on the Settings icon.
- Scroll to the right towards the end to Technical Info and select.
- Select Power (It should be the top option).
- You should now see four metrics: Battery, Voc, Vin, and lin.
The metric we’ll focus on is Battery. The battery should be greater than 3.7V (volts).

This is the voltage of the device’s internal rechargeable battery. If the device does not receive enough power to recharge the thermostat battery, it will shut off certain features to conserve power, like Wi-Fi or the display screen. That’s when you’ll get a low battery message or no power.
Below 3.6V, the thermostat could be out of battery and have a blank screen.
Another important metric is lin which is measured in milliAmps. The lin should be greater than 20.
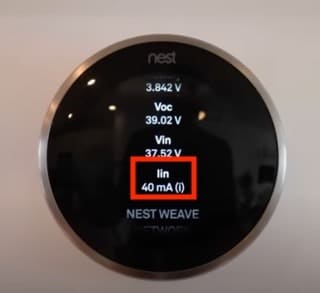
If lin is at or below 20, you could face some of the same issues even if your battery appears to be charged.
If your device does not appear to have enough power, I’d recommend checking the wiring. Many of the Nest thermostat issues start with wiring.
You are likely missing the C or common wire, which is necessary to provide continuous power to the device.
Fix #5: Factory Reset the Thermostat
Sometimes the best option is to start with a clean slate and factory reset a device so the software updates and you no longer have a blinking green light. You’ll lose many of your settings by taking these steps and will need to go through the entire setup process
Nest Thermostat
- Select Settings
- Select Factory Reset
Nest Thermostat E or Nest Learning Thermostat
- Press your thermostat ring
- Select Settings
- Turn the ring to Reset and press down
- Select All Settings
Again, this will erase all of your settings, so prepare to set your thermostat up like you did the first time. Be sure you have your Wi-Fi password.
Once you reconnect to Wi-Fi, the thermostat will need to update the software. Let’s cross our fingers and hope it goes well this time!
Conclusion
Nest Thermostats are a great smart home product, but they sometimes run into issues. A Nest blinking green light is one of those issues, unfortunately.
The steps in this guide will help you hopefully get your thermostat back to functioning properly.
- Restart your Nest Thermostat
- Check your Wi-Fi Connection and Signal Strength
- Charge your Thermostat using the USB port
- Check the Power Levels
- Check the Wiring
- Factory Reset the Thermostat
If they don’t, be sure to check the wiring. Most Nest Thermostat issues can be fixed by installing a C or common wire.
I hope this solved your Nest green blinking light and thanks for reading!