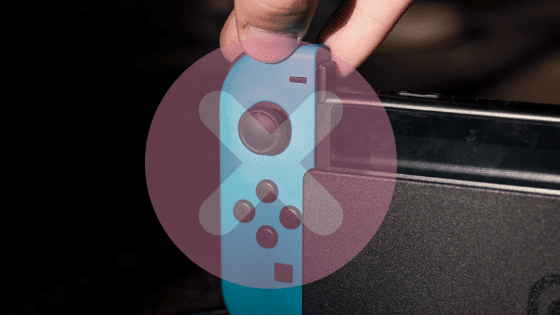
Left JoyCon Not Charging (Don’t Worry, Common Issue!)
The Nintendo Switch is notorious for JoyCon connectivity and charging issues. The left JoyCon, in particular, causes a lot of people trouble.
Luckily there is one fix that seems to work for the majority of Switch owners.
Left JoyCon Not Charging
More times than not, the left JoyCon stops working because it has stopped pairing with your Switch and a connection needs to be re-established.
To fix a left JoyCon that is not charging, go to System Settings > Controllers and Sensors > Disconnect Controllers. Hold the “X” button until you get confirmation that both controllers have been disconnected. Then fully power off your Nintendo Switch, turn it back on and reconnect your JoyCons. Problem solved!
 Quick Summary
The Nintendo Switch often has trouble with JoyCon connectivity and charging, especially the left one. To solve it, try these steps: Disconnect your controllers, power off your Switch, then reconnect; unpair and repair your JoyCons; clean your JoyCons and Switch with isopropyl alcohol or compressed air; Add conductive foam inside your JoyCon (risking warranty); get a new charging dock; or check your warranty or insurance to replace them. Try least to most drastic options progressively.
Fix #1: Disconnect your controllers and power-cycle your Switch
Here are some more detailed instructions on how to disconnect your controllers from your Nintendo Switch.
1. With both JoyCons slotted into your Switch, go to System Settings > Controllers and Sensors > Disconnect Controllers.
2. Then, on the right JoyCon, press and hold the “X” button until you get confirmation that all controllers have been disconnected. Click OK.
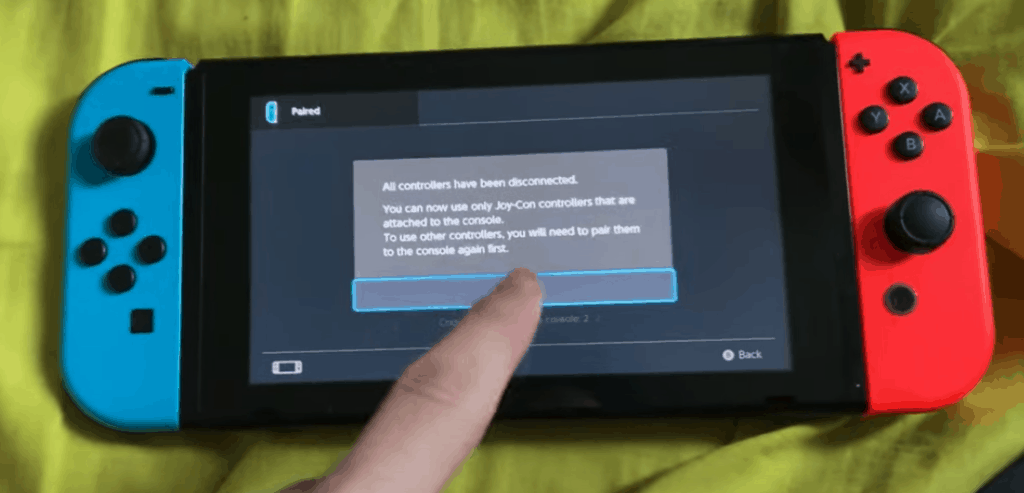
3. Now remove both the left and right JoyCons from your Switch. Press and hold the power button on your Switch and power off the device. Do not just put your Switch into sleep mode- actually, fully power it off.
4. Wait about 60 seconds and then power your Switch back on. When the Switch powers back up, go ahead and reconnect your JoyCons. They should automatically re-connect!
Fix #2: Unpair and repair your JoyCons
If your left JoyCon is still having issues at this point, another simple solution is to unpair then repair your JoyCons
1. Remove both JoyCons from the Switch
2. Go to Controllers > Change Grip/Order
3. Then press the small black button on the left and right JoyCons until you see green lights flashing up and down. This indicates that the JoyCons are ready to pair.
4. Reconnect both JoyCons and your issue should be resolved!
One of the first two fixes should work for most of you. If not, we have a few more fixes for you below to try.
Fix #3: Clean your JoyCons and Switch with isopropyl alcohol
If disconnecting your controllers and power cycling your Switch didn’t fix your issue, then you might have a dust or debris problem.
To solve this, you’ll need a clean Q-tip and some isopropyl alcohol. You might also want to use a pair of scissors to trim down the tip of the Q-tip to make it a bit smaller and more precise.
1. Before you get started, make sure your Switch is completely powered off. Don’t just put it into sleep mode!
2. With the Switch fully powered off, pour some isopropyl alcohol onto the Q-tip and proceed to clean both the side of the left JoyCon as well as the left side of the Switch itself.
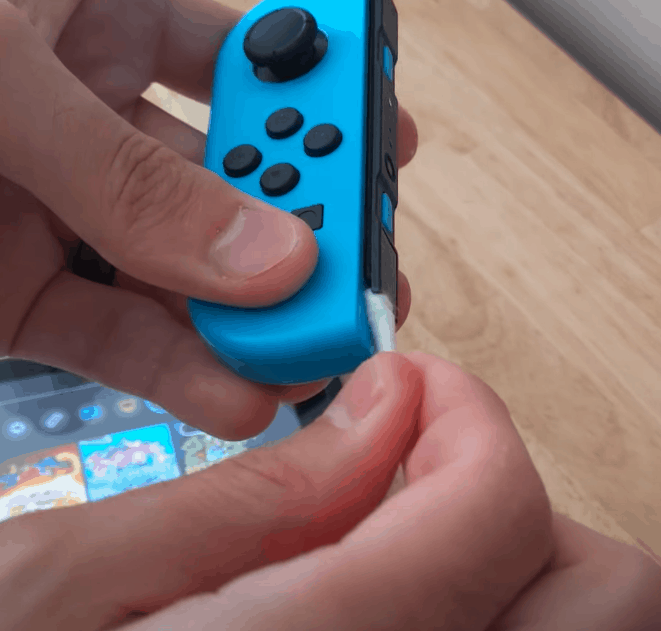
The important thing here is to get in all the nooks and crannies. Make sure every possible connection is thoroughly cleaned.
3. Then let everything dry. The higher the percentage of alcohol, the quicker it will dry.
4. Turn on your Switch and reconnect the JoyCons. This should do the trick!
Fix #4: Clean your JoyCons and Switch with compressed air
If the isopropyl alcohol didn’t work for you, then you’ll want to follow that up by blasting the JoyCons and your Switch with compressed air.
1. First, get yourself a bottle of condensed air and then fully power off your Switch.
2. Then proceed to blast air into all the same nook and cranny connections that you cleaned in the previous step.
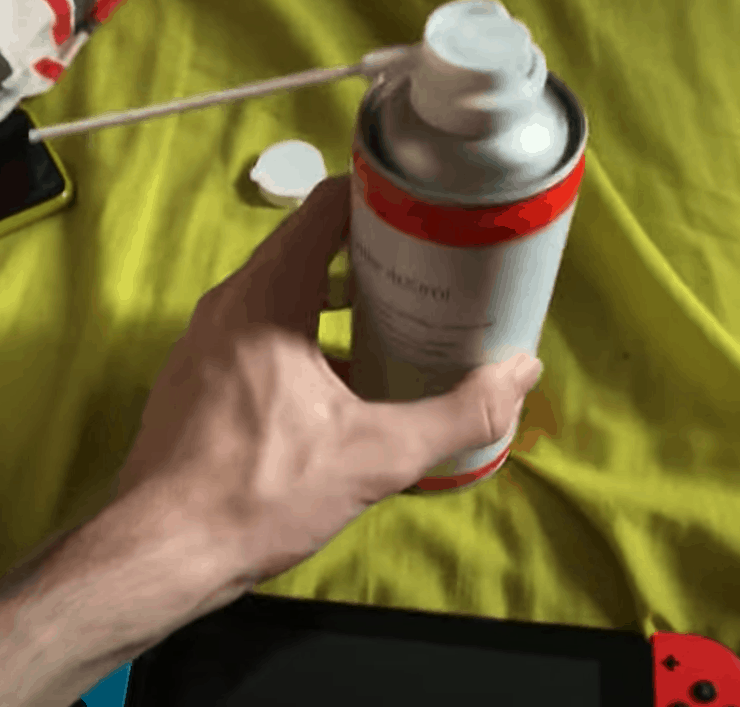
Really focus on changing angles and getting into the tough to reach areas on the sides of the Switch and JoyCons.
Don’t worry if the JoyCons or Switch get cold or appear frosty. They will quickly return to normal.
3. Power the Switch back on and reconnect the JoyCon controllers. Hopefully, your issue is solved!
Fix #5: Open up your JoyCon and add conductive foam
Before trying this next fix, please keep in mind that whenever you open up the JoyCon controller, or Switch for that matter, you risk voiding any existing warranty.
You may want to check your warranty before trying this fix.
If you’re not under warranty or comfortable with that, then go ahead and proceed to this next possible fix.
For this fix, you’ll need a Tri-point Y00 screwdriver, a Phillips 00 screwdriver, opening picks, a spudger, and conductive foam. You can get everything you need from Amazon using the links I provided.
1. Start by removing the four screws on the back of the JoyCon case. Next, carefully slide a pick along the side of the controller to pry it open. Be gentle, as there are some delicate cables attached inside.
2. Next, disconnect the battery and then use the pick to pop it out completely. Remove the now exposed three additional screws and carefully lift off the casing.
3. Apply a small piece of conductive foam over the antenna at the top right of the JoyCon and then reassemble the controller.
If a visual would help, here is a great video that walks you through the exact steps to follow:

Fix #6: Buy a new charging dock for your JoyCons
If you’ve made it this far and your left JoyCon is still not charging, then you might want to try buying a new charging dock for your JoyCons.
Many users have said that this actually fixed their problem when nothing else would. And realistically, it is still a better option than buying new controllers or even a whole new Switch.
If you want to try this, you can buy the Nintendo charging dock from Amazon right here.
For whatever reason, this charging dock was able to charge the left JoyCon for most folks successfully.
Then, by pressing and holding the small black button on the side of the controller, it can be re-paired to the Switch.
Fix #7: Check your warranty or insurance plan
When all else fails, you should check to see if you have a warranty or if you bought insurance for your Nintendo Switch or your JoyCons.
In some cases, you might be able to send it in for repair or even get a completely new device.
You can call Nintendo’s Consumer Assistance Hotline at 1-800-255-3700 to get more information or visit their support website.
Conclusion
If your left JoyCon is not charging, you’ve got company. The Nintendo Switch is notorious for this issue. Here are the most common ways to fix it, listed in the order of which you should try.
- Disconnect your controllers and power-cycle your Switch
- Unpair and repair your JoyCons
- Clean your JoyCons and Switch with isopropyl alcohol
- Clean your JoyCons and Switch with compressed air
- Open up your JoyCon and add conductive foam. Keep the warranty risk in mind!
- Buy a new charging dock for your JoyCons
- Check to see if you have a warranty or insurance coverage to get a new device
Though troubleshooting can take time, it’s still worth trying these steps before spending the money for a brand-new JoyCon device. Please let us know if this article helped you!