Nest Thermostat Delayed (Very EASY Fix!)
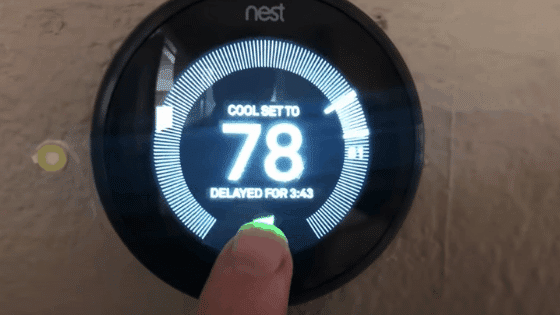
Does a “Delayed” message keep popping up on your Nest thermostat, causing heating or cooling issues in your home? Does the Nest delayed message include a countdown or simply say delayed?
Don’t panic – there are two common ways to fix this.
One is easy, but it will need to be repeated again in the future. The other is a bit more technical, but it will permanently resolve your issue.
Nest thermostat “Delayed”
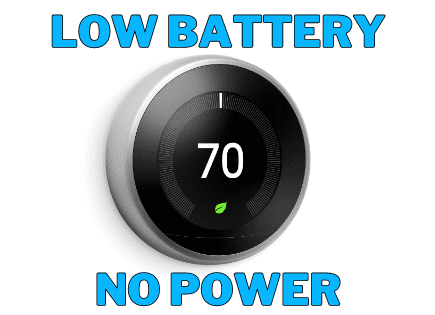
The “Delayed” message on your Nest thermostat indicates low power. A temporary fix is to pull off the Nest thermostat display, plug it into a USB port, and charge it for 2 hours. The longer-term fix requires you to connect a Common (C) wire to both your Nest and your furnace.
What causes the “Delayed” message on a Nest thermostat?
The Nest Learning Thermostat and Nest Thermostat E come with rechargeable lithium-ion batteries inside. These are backup batteries and nothing more.
The latest Nest Thermostat, simply called “Nest Thermostat,” has replaceable AAA alkaline batteries. It can be a bit confusing to confirm which model of the Nest Thermostat you own.
In the event that your power cuts out, for whatever reason, the Nest backup batteries will kick in and save your Nest data and settings.
These rechargeable batteries are very difficult to replace and it is rarely necessary.
The batteries are not accessible. You’d have to start taking your Nest apart, piece by piece, to gain access.
When the rechargeable batteries start to drain, your Nest will likely start to malfunction.
One of the first signs of this is the “Delayed” message you’re seeing now.
This issue is caused by the same situation as a low battery message.
Short-term fix – Charge your Nest
Luckily, there is a very easy, short-term fix that will get your Nest thermostat working again and resolve the “Delayed” error.
All you need to do is charge your Nest.
To do this, start by taking off the Nest thermostat display. Turn it around and you will see a USB port on the upper back of the device.
The type of USB charging cord you need (either micro-USB or mini-USB) depends on the model of Nest you own.
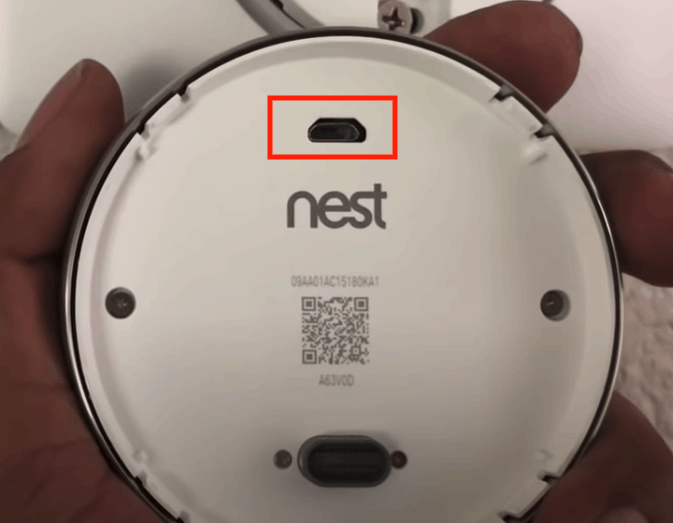
Plug it into a USB wall charger to start charging your Nest. Do not use a computer or USB port from another device.
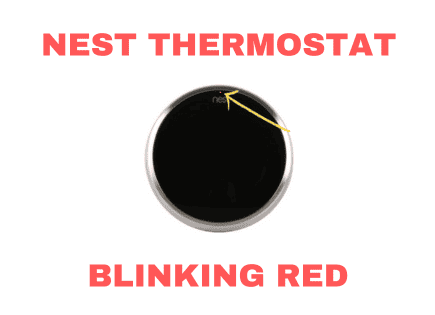
Make sure the Nest is blinking red, as this indicates that it is successfully charging.
Charging could take several minutes or up to an hour. If it takes longer than an hour, you might have another issue.
Once the device has enough charge, the display screen will light up with a message to reconnect to the base.
You can review USB charging compatibility here.
Now that your Nest is done charging, you can reconnect it to your wall. After a while, the battery will eventually drain and you’ll need to recharge it again.
If you want this issue solved forever, keep reading for a more permanent solution.
Long-term fix – connect C wire to Nest and furnace
For the majority of Nest setups, the Nest will draw a small amount of power from either the heating or cooling wires. This power is just enough to keep the Nest powered and on all the time.
However, on occasion, the heating and/or cooling wires don’t provide enough power for the Nest. In those cases, you need something called a Common wire (“C wire”).
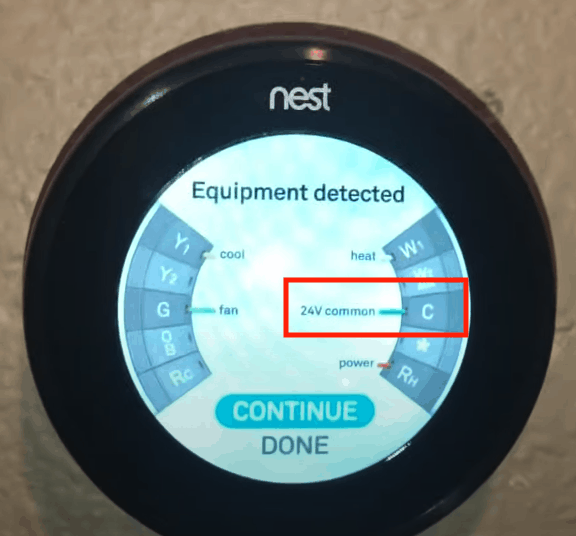
Before we start, go to Settings on your Nest and scroll over to Equipment.
Your Nest will provide a live view of which wires it is detecting. The yellow wire is your cooling, white is heat, green is the fan, and power is red.
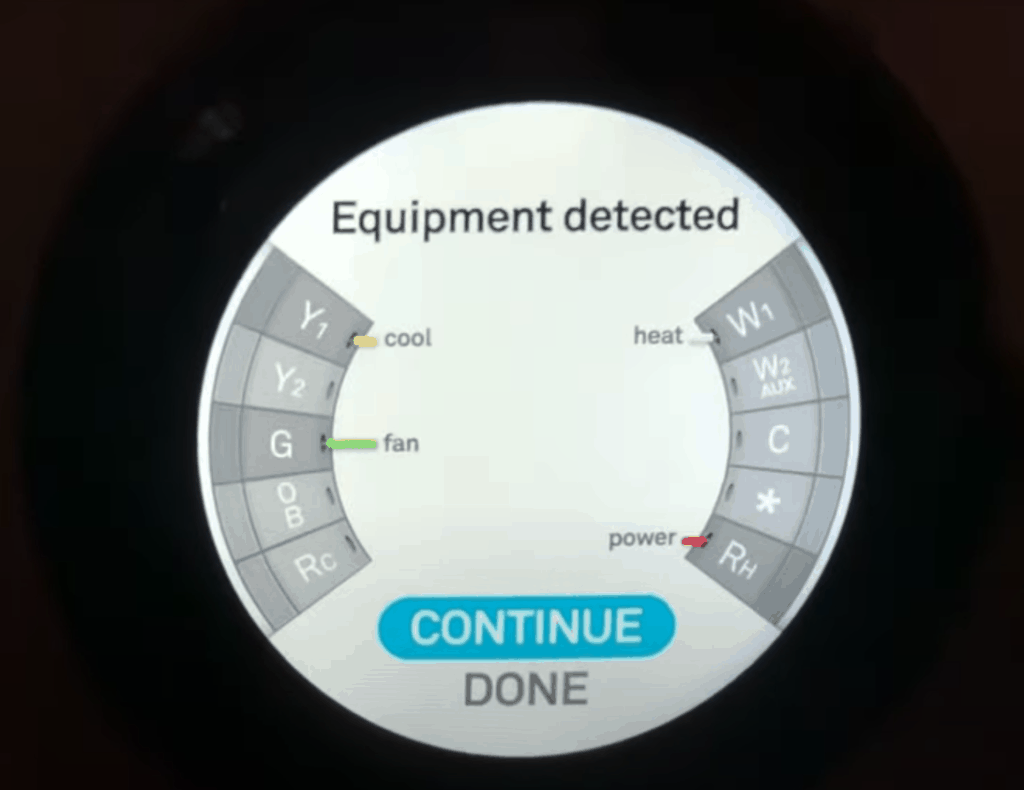
The wire you’re looking for is blue, the Common wire that plugs into “C”. The Common wire will pull a tiny amount of low-voltage power from your furnace to power your Nest.
If you don’t see a blue Common wire on the Nest display, you will want to read on.
1) To start, go to your circuit breaker and turn off the breaker that controls the Nest thermostat and do the same for your furnace (or just unplug it). You want all the power OFF.
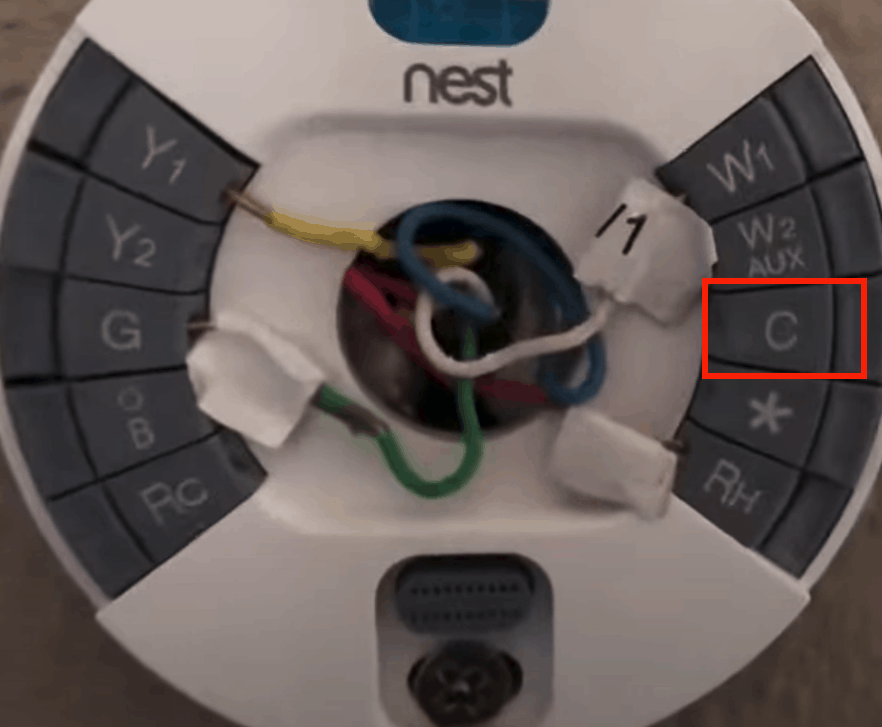
2) Next, take the display case off the Nest and take a quick look at the wires present. You will see all wires connected except one. You might have to dig around a bit to find it, but my guess is there is a blue Common wire hidden in there somewhere.
3) Once you find the Common wire and confirm that it is present, it’s time to go to the furnace.
4) Inside the furnace, you’re looking for a motherboard that has all of the low-voltage wires attached. You might have to remove a metal panel from the furnace to get to the motherboard. You’ll probably need to remove a few screws first.
5) When you find the low voltage wires inside your furnace, you’ll probably see two main wires that split off. One main wire has 2 off-shooting wires coming from it, and the other main wire has 5 off-shooting wires.
6) Leave the main wire with 2 off-shooting wires alone. This one connects to your outside AC unit and isn’t the one we want.
7) The other main wire with 5 off-shooting wires is our Nest thermostat wire. One of those 5 off-shooting wires is blue and is not connected. That’s your Common wire. You want to connect that Common wire to the motherboard where it says “Com.”
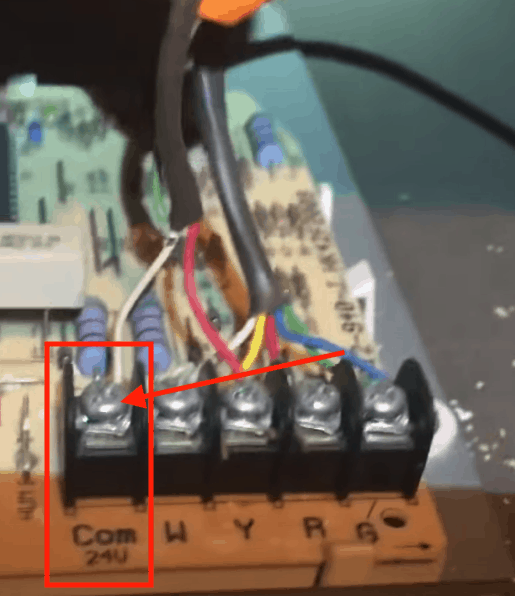
8) There might already be a wire connected to “Com.” That’s OK, it can handle two wires without a problem.
9) Keeping the furnace and Nest powered off, return to the Nest, pull out the blue Common wire, and connect it to the “C” port of the Nest.
10) Now turn the power to the furnace and the Nest back on. Replace the Nest display cover, go to Settings, and scroll over to Equipment again. Confirm that the blue C wire is now showing on your Nest.
11) That’s it, all done! Your Nest should get a steady stream of power now and you should never see the Delayed error again.
Common problems that a C wire fixes
If you’re still not convinced about adding a C wire to permanently resolve the “Delayed” error message. Well, here are five other common issues a C wire fixes:
- The system is making strange noises: chattering, stuttering, clicking or thumping ‒ this can be caused by your system turning on and off rapidly
- Heating or cooling is always on and won’t turn off
- Heating or cooling repeatedly turns on and off in a short period
- The system fan is always running or won’t turn on
- The system fan turns on and off repeatedly in a short period
Simply put, Nest thermostats work best when they are getting consistent power. The only way to achieve this consistent power delivery is with a C wire!
Nest Customer Support
If you’re not sure what’s wrong or don’t feel comfortable fixing your system, the best solution for power issues is to contact a Nest Pro in your area.
They can diagnose and help fix any possible problems with your system and thermostat installation.
If needed, they can also connect a C wire or a C wire accessory, such as a Nest Power Connector to your Nest thermostat.
Conclusion
If you’re seeing the “Delayed” message on your Nest thermostat, it’s an indication that your Nest battery life is running low.
There are two fixes for this.
The first is temporary and involves simply removing the Nest display case and plugging it into a USB charger. It can take up to 2 hours to fully recharge your Nest.
After a while, though, your Nest battery will drain again, and you’ll need to recharge it.
If you want a more permanent fix, you can connect the blue Common wire to your Nest and to your furnace.
This will constantly supply your Nest with low-voltage power and you’ll never have the Delayed issue again.
I hope this guide was helpful! Let me know in the comments what worked for you.