Can Ring Floodlight Be Mounted Horizontally Under Eaves? (Yes, but…!)
Does your home have an existing flood light hook-up under an eave or soffit? Would you like to install a new Ring floodlight cam there but you’re concerned about mounting it horizontally?
Can Ring Floodlight be mounted horizontally?
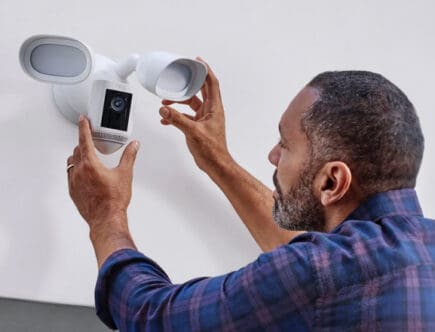
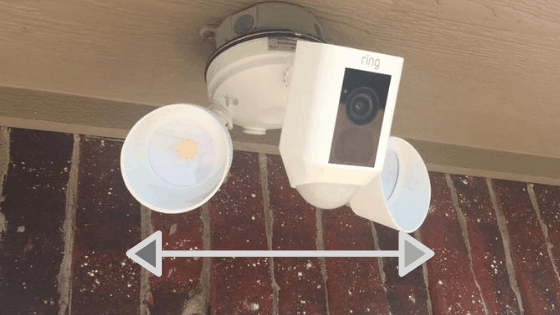
The preferred install for Ring floodlight cams is vertical; since the product was designed to perform optimally in this “vertical position”. However, you can absolutely mount it horizontally under an eave or soffit. To accomplish a horizontal mount of the Ring floodlight, the camera ball-socket mount must be adjusted and rotated 180 degrees. All you need is a screwdriver and a couple of minutes!
The problem with mounting Ring Floodlight horizontally
To put it simply, the Ring floodlight cam has a design flaw in that it wasn’t really built to be installed horizontally, only vertically.
After scouring Ring’s support site, community forums, and Twitter account, here is the contradictory information I found on the topic:
Ring community forum: “Installing the Floodlight Cam directly on an eave or soffit at a vertical angle can affect motion and light triggering as well as the camera’s view. This is because the sensors and camera will be pointed directly to the ground rather than being at the preferred angle facing out. It will likely keep it from functioning properly and recording.”
Ring support site: “Can I install Floodlight Cam upside-down or horizontally? Yes. Floodlight Cam can be mounted on a wall or ceiling.
Ring’s twitter account: “We do not recommend installing in this manner [horizontally] as your device’s field of view, video and motion detection will be adversely affected. However, we will be sure to share your concerns with our Development and Design teams for consideration.”
The main issue is clearly about the field of view of both the motion sensor and video camera.
If placed at the wrong angle, the motion sensor will be compromised and not pick up movement and you’ll have a hard time capturing the desired area with the camera.
That’s the bad news.
The good news is hundreds of Ring floodlight users have successfully mounted their cameras horizontally under an eave or soffit.
While many different approaches were tried, there was a clear winner that only required a single tool and very little time.
The best way to horizontally mount Ring Floodlight cam
In order to horizontally mount the Ring floodlight cam properly and not compromise any functionality, you’ll need to follow the steps listed below:
1. Use the screwdriver that comes in the box to completely remove the screw that controls the camera/motion sensor angle.
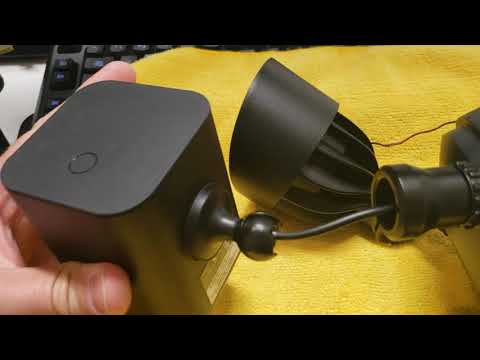
2. With the screw removed, pop out the camera from the ball-and-socket connector.
3. Next, use your hand to loosen the ball-and-socket connector lug nut at the base.
4. Rotate the ball-and-socket connector by 180 degrees so that the tightening screw is now at the top of the camera.
5. Pop the camera back into the ball-and-socket connector and replace the screw.
If a visual would help, here‘s a video explanation of the steps above.
This entire process only takes a minute or two and allows the camera/motion sensor angle to adjust uninhibited as needed while in the upside-down, horizontal position.
The hack to horizontally mount Ring Floodlight cam
Here’s another approach you can take if the adjustment above does not give you enough range of motion with your camera/motion sensor for your horizontal application.
Be warned that this process does permanently modify the collar of the ball and socket mount. This likely voids any warranty you might have with the Ring floodlight. If you’re okay with that, read on!
Here’s what you can do to increase that range of motion:
1. Use the screwdriver that comes in the box to completely remove the screw that controls the camera/motion sensor angle.
2. With the screw removed, pop out the camera from the ball-and-socket connector.
3. Use a cutting tool (like a dremel) to grind the ball-and-socket connector down to the desired spot. This way, the camera angle can move up unrestricted.
Here’s a video explanation of the steps above if you’re having trouble following.

This process takes a bit longer and requires a specific tool in order to grind down the camera arm sufficiently enough (and with enough control such that you don’t accidentally nick the wiring).
I really only recommend this approach if your specific setup requires it.
However, enough folks have gone this route successfully that I think it’s safe to say it works and is a viable option.
Replacing an existing light fixture with Ring Floodlight
Now that you have two approaches to improving the camera/motion sensor angle, it’s time to install your Ring floodlight horizontally!
Safety first- before making any changes to an existing light fitting, always go to your circuit breaker and cut the power!
It’s amazing how many injuries could be avoided by simply taking this step.
With the power turned off, you can now follow these steps to replace your existing light fixture with your new Ring floodlight:
1. Remove the existing fixture – there is no standardization here, so take a look and you’ll figure it out. It’s usually just a few screws that need to come loose.
2. With the wires exposed, proceed to remove the wire nuts. If you want to be extra cautious, check with voltmeter to make sure the power is actually zero.
3. Now disconnect the wires and remove the existing fixture entirely. You may also find some old mounting hardware that needs to be removed.
4. Attach the new Ring floodlight hardware/mounting bracket. Adjust as needed, as the location of this bracket will determine where the camera ultimately faces!
5. Use the hanging hook from the package to hang the Ring flood light while you work on wiring it. White wire to white wire, black to black, ground to ground.
6. Push the light up into the mounting screws and secure it with the provided nuts.
7. Now, with the light set, you can position the camera by loosening the screw at the back.
8. If necessary, adjust each LED light by hand loosening and tightening each bracket.
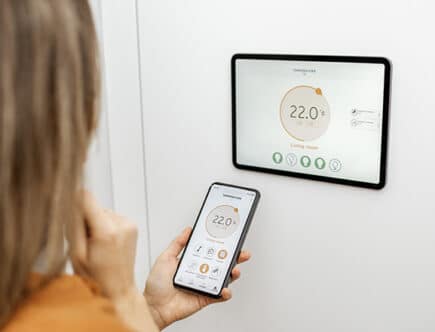
9. Complete the setup in the Ring smart phone app!
Here’s a video explanation of the steps above if you’re having trouble following.

Conclusion
While there is contradictory information from Ring on their suggested floodlight cam mounting/installation, it is definitely possible to mount it horizontally under an eave or soffit.
The easiest way to accomplish this is to rotate the camera ball-and-socket connector by 180 degrees. This only requires a screwdriver and just a couple of minutes.
If that adjustment doesn’t give you enough range of motion, you can permanently modify the collar of the ball and socket by grinding a section of it down.
Hopefully, this has helped you during your installation process and your Ring Floodlight is up and running – horizontally!