Blink Camera Not Recording (Motion & Live Recording FIX!)
If your Blink camera(s) are not recording motion or live action, don’t panic – this is a very common problem.
There are three primary things to check if your Blink camera is not recording:
- Does your current Blink subscription support recording?
- Are your cameras working properly?
- Do you have the correct camera recording settings?
Check your current Blink subscription
The most likely reason your Blink camera is not recording is because you are not paying for it!
When Blink cameras first came to market, they automatically came with free recording to their cloud servers. Blink’s server provided each sync module with storage up to 7,200 total seconds, or 2 hours.
This free recording/storage offering is what helped make Blink so popular. No one wanted to pay for a monthly subscription, and Blink was one of the few security cameras that didn’t come with a recurring charge.
But starting on April 16th, 2020, Blink changed to a subscription based model where you have to pay for cloud storage for both live view and motion detection video recording.
If you opened up an account on or after this date, then you have to pay for a subscription to their cloud storage.
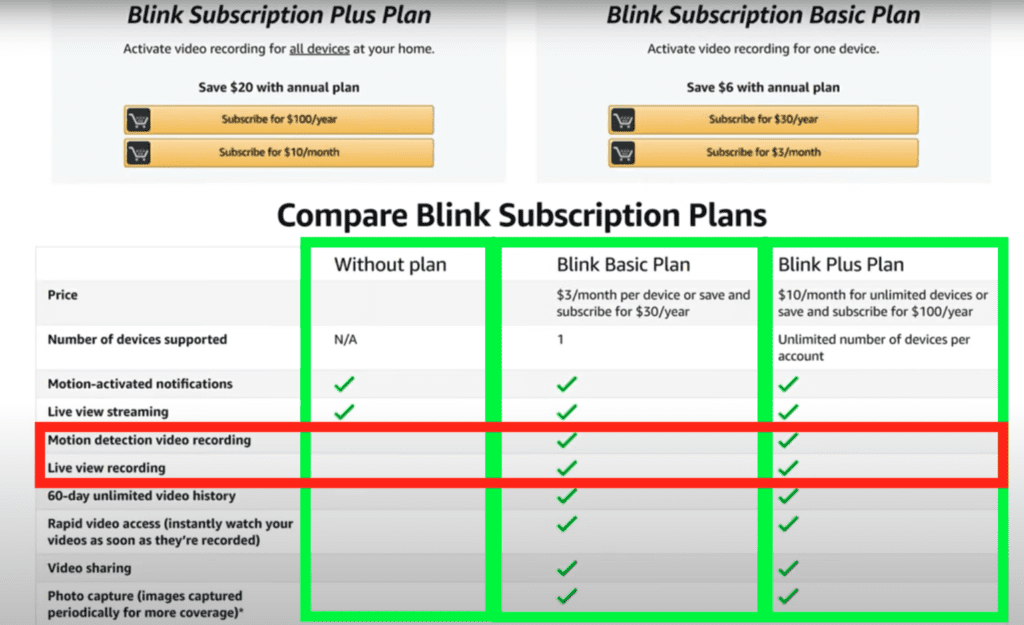
Don’t worry, if you had an account before April 16th, 2020 your account was grandfathered in. You will still have 7,200 seconds, or 2 hours, of free cloud storage per grandfathered sync module.
Blink’s new subscription model is very similar to Rings – it’s $3 a month per device or $10/month for unlimited devices.
So if you’re not paying for the basic or plus Blink subscription, that’s likely why your blink cameras are not recording.
That said, several new blink devices such as the Blink Video Doorbell, Outdoor, Indoor (gen 2) and Mini cameras all come with a local storage capability (the XT2, XT and Indoor (gen 1) do not have this local storage).
That means for those newer Blink cameras, you can use a flash drive (1GB-256GB capacity) to record and save footage, even if you’re not on a paid subscription plan.

If you are grandfathered in, or you’re paying for a subscription, the flash drive (local storage) will act as a back up – downloading footage from the cloud to the flash drive once a day.
There are also several downsides to using local storage when recording with Blink:
- If you’re using local storage and you have “Early Notifications” on and then tap “Live View”, your recording will immediately stop
- When you go to your recordings in the Blink app, there will be no thumbnail
- There is a delay when retrieving recordings from the app due to an extra step – going from flash drive, to Blink servers then to your phone. Cloud based recordings go straight to the app from Blink servers.
- There is no auto delete of recordings. You need to manually delete clips if storage runs out. You will get a notification if your local storage is running low (less than 375 MB of free space remaining).
- If your power goes out, or you lose WiFi, any partially saved clips will be lost
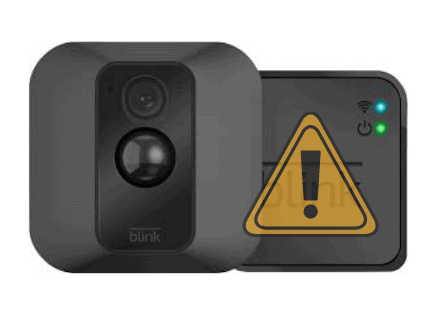
Make sure your Blink cameras are working
If you are sure you’re able to record with your Blink camera by
- paying for cloud storage via a subscription
- grandfathered into free cloud storage or
- using local storage via a USB drive
then the next step is to make sure your Blink cameras are actually working.
To start, open up the Blink app and check the live view of each and every camera you have. You can do this by clicking on the video icon and waiting for the feed to load.
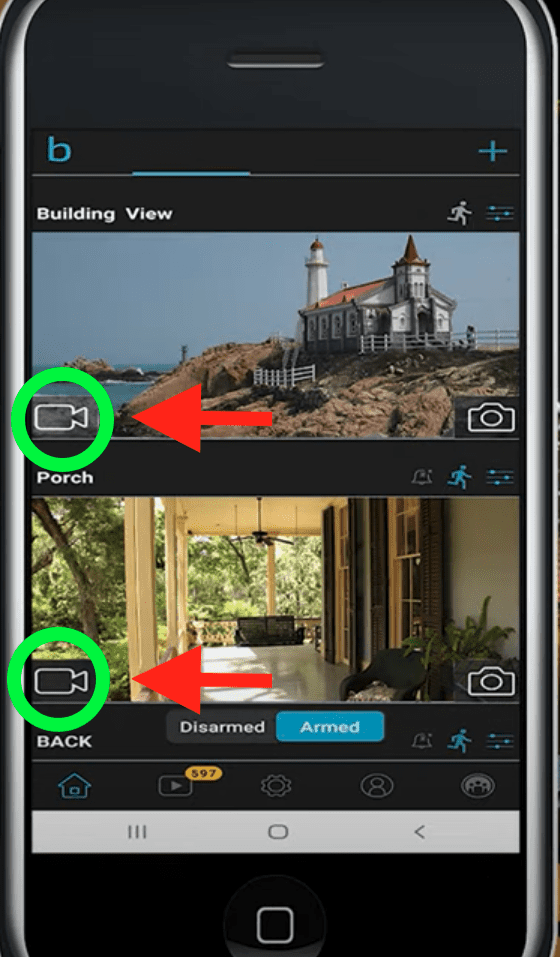
If the live view is working, you can move ahead to the checking Blink camera settings section below.
If live view isn’t working, the most common cause is lost, or poor signal strength.
Signal strength comes in a few forms:
- Camera WiFI signal strength
- Camera to Sync Module signal strength
- Sync module WiFi signal strength
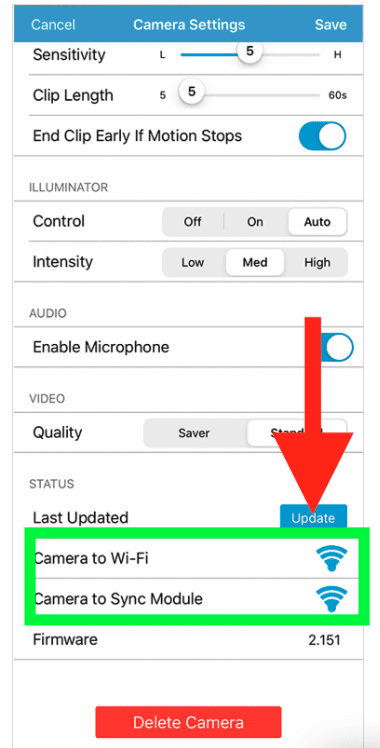
You can check the first two by clicking on setting icon of each camera and then scrolling all the way to bottom where it says “Status”. Click “Update” to get the latest readings.
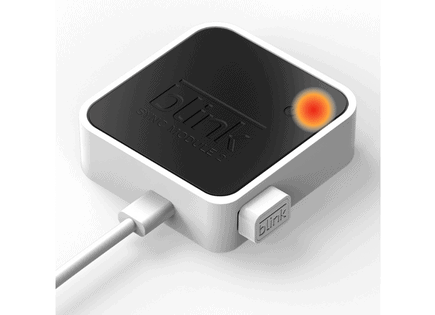
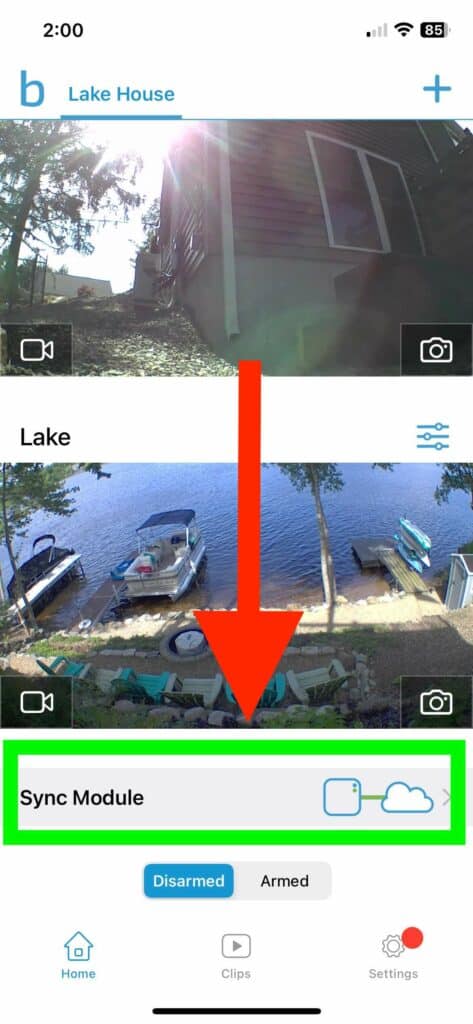
You can check the Sync Module signal strength by opening up the Blink app, scrolling to the bottom and clicking on “Sync Module”. You’ll see your Sync Module status at the top.
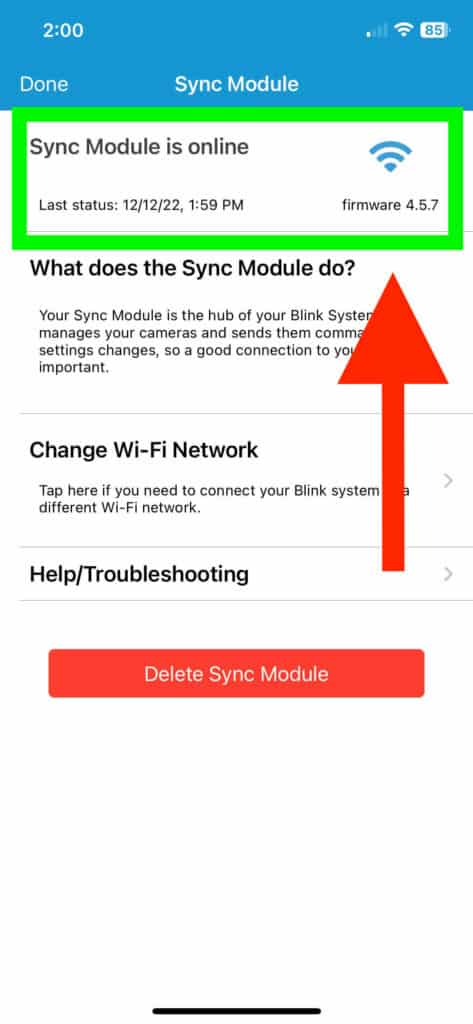
You want to see at least 3 bars of signal strength. If you see less than 3 bars of signal strength for your cameras or sync module you should try:
- Unplugging your Sync module for 2 minutes before plugging it back in
- Unplugging your WiFi router for 2 minutes before plugging it back in
- Replacing the batteries in your Blink cameras
- Moving your Sync Module closer to your WiFi router
- Moving your cameras closer to Sync Module (cameras should be 100 ft or less from Sync module)
- Resetting your Sync module by pressing and holding the reset button for 10 seconds
- Resetting your Blink cameras by pressing and holding the rest button for 10 seconds
Hopefully one, or more of these fixes was able to get your cameras working again.
Check Blink camera recording settings
At this point you’ve confirmed that your Blink camera is able to record AND all your Blink cameras are on and working. Now it’s time to make sure you have the correct camera settings.
Without the correct camera settings, your Blink cameras will not record properly! Here are the recording settings you should double check:
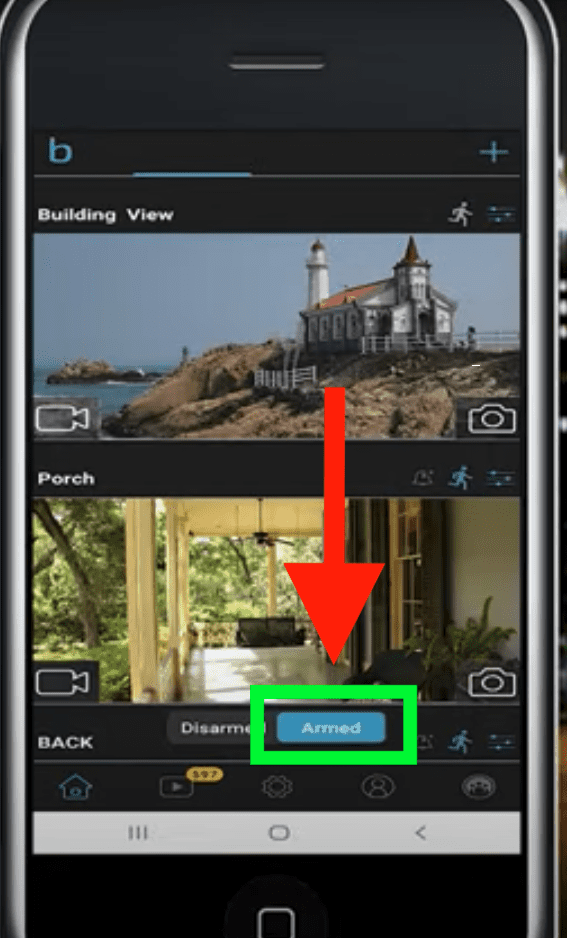
Step 1. Make sure your system is “Armed”. Open up the Blink app and make sure “Armed” at the bottom is highlighted blue.
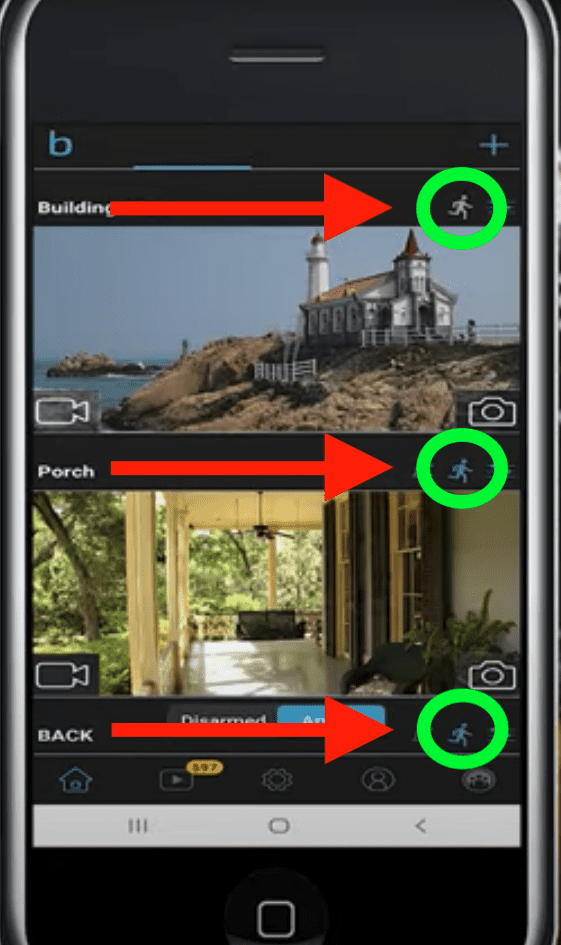
Step 2. Make sure “Motion Detection” is enabled for every Blink camera. To enable “Motion Detection” simple slick on the running man icon. If this icon is blue, “Motion Detection” is turned on for that camera.
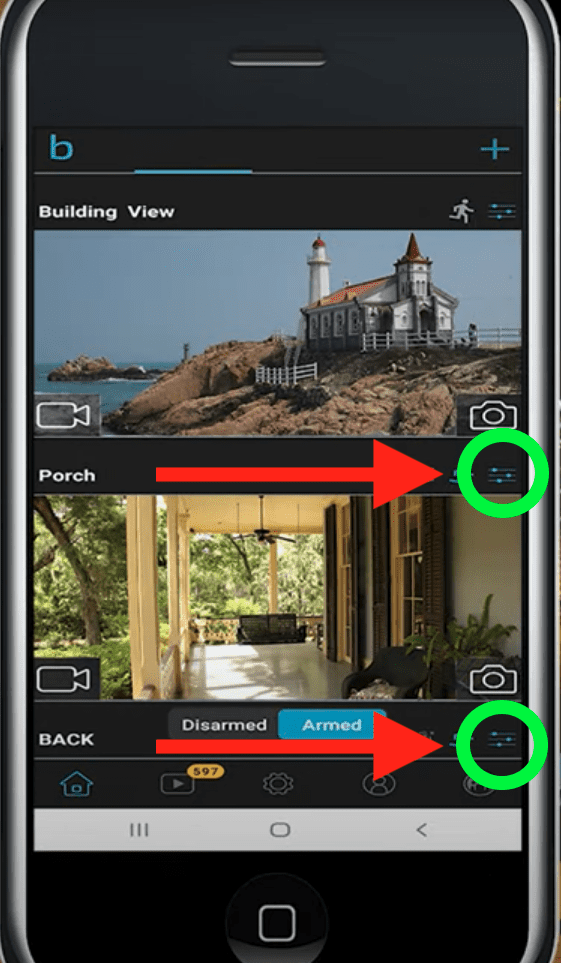
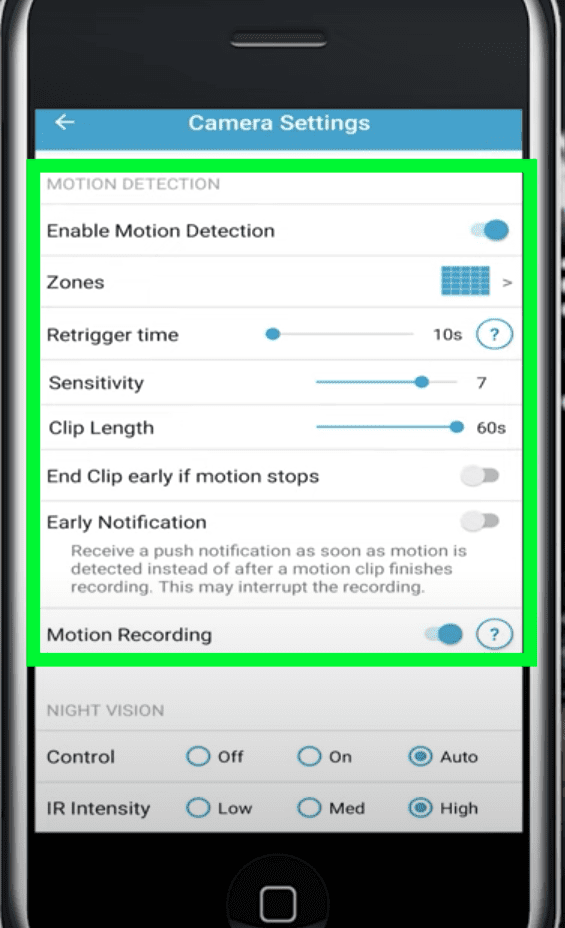
Step 3. Check motion detection settings for each and every Blink camera. Click the settings icon and then scroll down to the Motion Detection section.
Make sure:
- Motion Detection is enabled
- Zones are properly set
- Sensitivity is turned up to 7
- Motion Recording is enabled
Step 4. This isn’t a setting, but it’s equally important – the max motion detection range is about 20 feet for all Blink cameras! That means if the motion is > 20 feet away, your camera may not detect/record it.
Conclusion
If your Blink camera is not recording, do the following:
- Make sure you are either paying for cloud storage via a subscription, grandfathered into free cloud storage, or using local storage via a USB drive
- Ensure each of your Blink cameras are on, and that live view is working
- Make sure your system is Armed
- Enable Motion Detection on each camera
- Set up Activity Zones properly for each camera
- Turn motion Sensitivity up to 7 for each camera
- Make sure Motion Recording is enabled for each camera
Ultimately, even if you do all the steps above, your Blink camera will not record any motion that occurs more than 20 feet away. So make sure your cameras are installed at appropriate distances from the action you’re trying to record!