AirPods Connected but No Sound (EASY Fix!)
I own AirPods and AirPod Pros, and both experience the same issue quite a bit – they show as “connected”, but there is no sound!
There are countless cases of AirPods owners who say they’ve had this problem – some say it’s been an issue they’ve dealt with for multiple years!
Luckily there is a very easy fix that should resolve the majority of AirPods that are connected but have no sound.
AirPods connected but no sound
If your AirPods are connected, but there is no sound, turn OFF your phone’s Bluetooth, then turn it back ON. If that doesn’t work, go to Settings > Bluetooth > Info > Forget This Device. With your AirPod case lid open, hold the button on the back for ten seconds to re-pair.
This will fully reset, and then re-pair your AirPods, and they should successfully connect this time.
If they aren’t working yet, don’t panic, there are several other proven steps you can take to fix this issue. Follow every step below and I’m confident you’ll get your AirPods working again.
Note: It’s unclear exactly what causes this connection issue, and Apple has not acknowledged that it’s a problem, but it has been reported too many times and happens far too often to be considered “expected behavior”. Regardless, there are several proven ways to fix it.
Reset Bluetooth
When your AirPods show that they’re connected but there is no sound, the very first thing you should try is resetting your phone’s Bluetooth.
This is the quickest possible fix, and it works for me about half the time.
To reset your Bluetooth:
- Go to Settings
- Then select Bluetooth
- Toggle Bluetooth OFF and wait 20 seconds
- Then toggle Bluetooth back ON
- Reselect your AirPods and try to connect
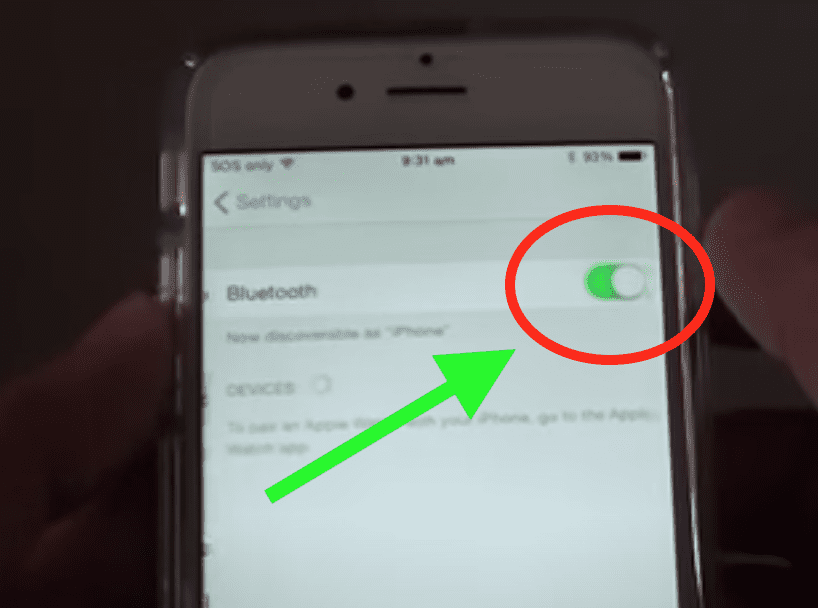
Alternatively, you can swipe down on the home screen and then click on the blue Bluetooth icon, turning it grey (off). Wait 20 seconds, then click the Bluetooth icon again turning it blue (on).
If this doesn’t work for you the first time, you can try it one more time before moving on. Typically, just by forcing your phone to try and reestablish a stable Bluetooth connection, you can fix this problem.
If the sound is still not working, try resetting your AirPods…
Reset your AirPods
This fix is very easy, but just a bit more involved than resetting your Bluetooth. The good news is that this will work for about 90% of you.
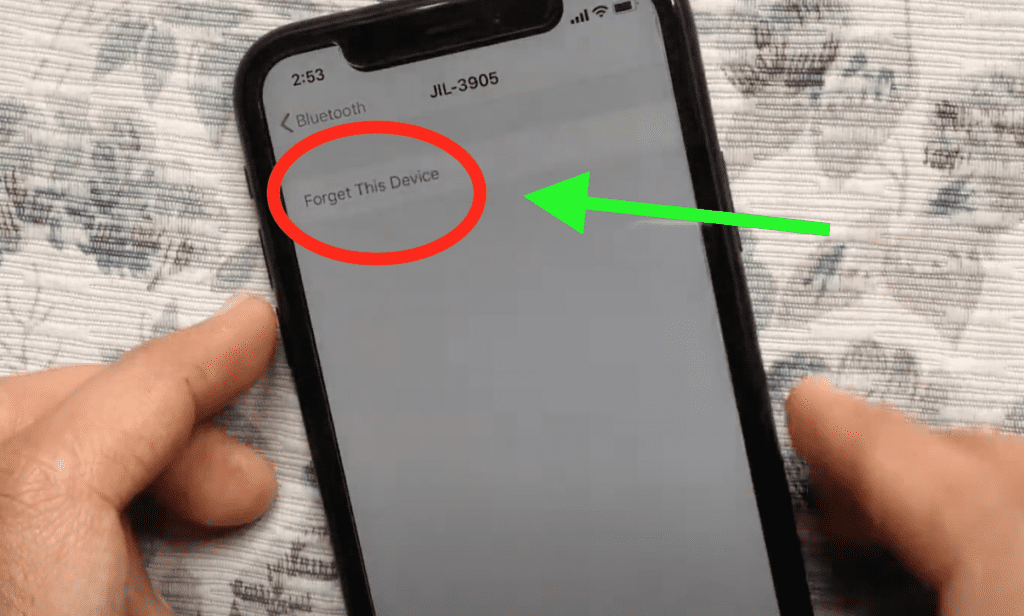
To start, you’re going to need to “Forget This Device”. To do this:
- Go to Settings
- Then select Bluetooth
- Click the info icon next to your AirPods
- Select “Forget This Device”
- This will successfully remove your AirPods from your phone
Now that your AirPods are removed, you’ll need to re-sync them.
To re-pair your AirPods, follow these steps:
- On your phone, make sure Bluetooth is ON
- Put both AirPods in the charging case and open the lid
- Press and hold the button on the back of the AirPod charging case until the case status light blinks white
- Your AirPods should pop up on your phone. Select “Connect”
- Your AirPods will take a few seconds to connect but then you should be good to go!
This process will entirely reset your AirPods and your sound should be working now.
If you’re part of the unlucky 10%, don’t panic, there are several other fixes that will likely solve this for you so read on.
Reset your iPhone
Sometimes this sound issue isn’t necessarily with your AirPods, but instead, it’s caused by your phone.
There are really two ways to go about resetting your phone. The first is simple, just fully power your phone down.
You’d be surprised how many software/connection issues you can solve by just doing the old power-off, power-back-on fix.
This is primarily because a phone reboot clears the current state of your phone’s software, so any issues your phone has run into should get wiped clean.
To power down your phone, press and hold the side button and any volume button at the same time (older versions of the iPhone only require you to hold the side button).
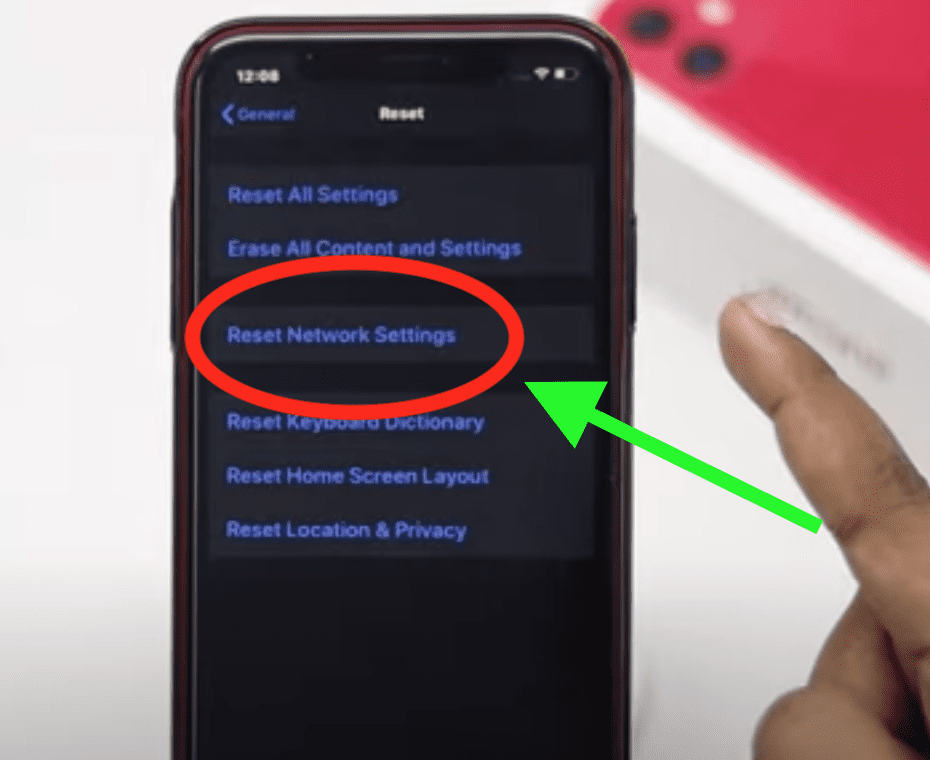
The second way to reset your iPhone is to Reset Network Settings. This action removes all previous connections and disconnects you from any active networks you’re on.
To Reset Network Settings on your iPhone:
- Go to Settings
- Scroll down to General
- At the bottom, select Reset
- Finally, choose “Reset Network Settings“
Update iPhone software
iPhone software is constantly getting updated, improved, and fixed.
If you’re running old or outdated software, it’s very possible that this is causing an issue with your AirPod’s Bluetooth connection with your phone.
Always make an effort to update your phone whenever you can. I recommend you turn Automatic Updates on so that your phone will schedule these updates during the nighttime when you’re asleep.
- Go to Settings
- Scroll down to General
- At the top, select Software Update
- Then choose Automatic Updates
- Toggle Download iOS updates and Install iOS updates both on
- Now select Back and see if any updates are available
- If there is an update available, select Install Now
Running the latest software ensures that your phone is working at its best! You can avoid a lot of issues just by staying on top of these.
Turn off nearby devices
Another possible fix to get this issue resolved involves turning off any and all Bluetooth devices nearby. This means actually powering them down.
If you have other phones, headphones, mouses, keyboards, etc. in the area, it is possible that there is interference happening.
You can be sure to avoid this by shutting all those devices off.
Alternatively, you can go to your iPhone and “Forget This Device” for each and every one of these Bluetooth gadgets. This process was defined above if you need a reminder for how to do this.
By taking this step you can be sure that no interference is happening.
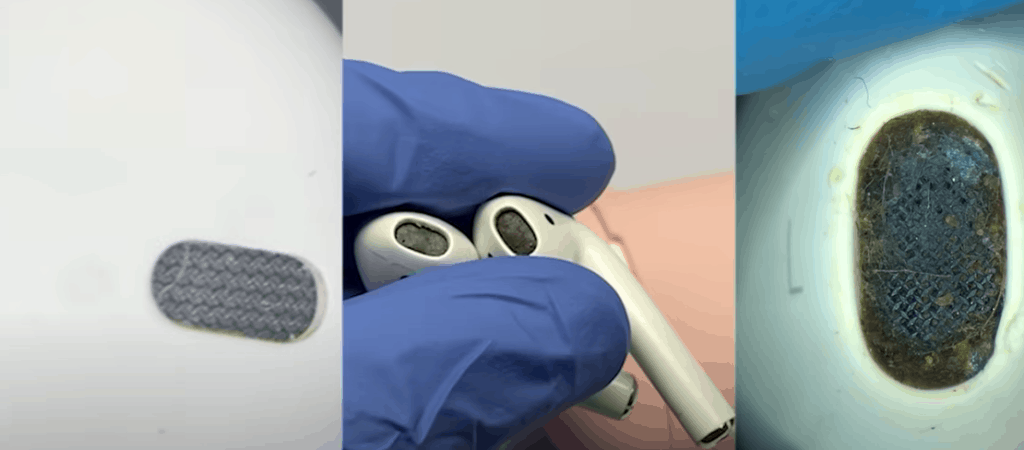
Clean AirPods and charging ports
Believe it or not, if you aren’t hearing any sound coming from your AirPods, it could be due to dirt, grime, and earwax that have built up on your AirPod and down inside the charging port. Gross!
Start by grabbing a Q-tip and gently wiping the bottom metal ring of your AirPods clean. Then open your charging case, and clean out the charging port. Make sure to get all the way down to the bottom.
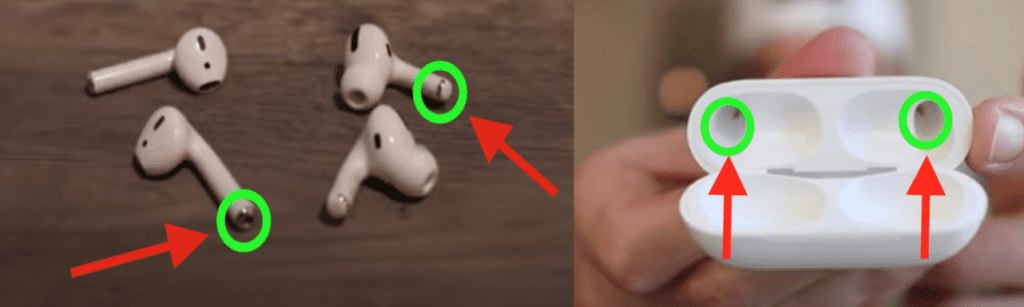
If you need to, you can add a little isopropyl alcohol to the end of the Q-tip to really get a deep clean. Don’t worry, Apple approves!
While you’re at it, check the speaker of your AirPods! This gunk can get so built up that your AirPods even sound quieter!
If you have AirPods Pro, you may have to remove the tip to check if the speaker is covered in gunk. Again, use a Q-tip to clean up any caked-on earwax or dirt.
I find it helpful to grab a flashlight or use the flash on your phone to get a better look.
If you make sure those charging connection points are nice and clean and the AirPod speaker and sensors are clear, you’ll likely resolve this issue for good.
Turn off Automatic Ear Detection
By default, AirPods have technology built into them to sense when they are in your ear. Once this is confirmed, audio starts to be received from your device.
While the tech is cool, anything that goes wrong with this process will lead to an incomplete connection and sound will continue coming through your phone, instead of your headphones.
(The number one reason this feature acts up is from dirty headphones. So make sure you clean them well following the instructions above!)
I would start by simply turning off Automatic Ear Detection to see if that’s what’s causing the issue. Keep in mind that once you turn this off, your AirPods will keep playing even when you take them out of your ears.
Here’s how to turn off Automatic Ear Detection:
- Go to Settings
- Then select Bluetooth
- Tap the Info button next to your AirPods
- Scroll down and toggle OFF Automatic Ear Detection
See if this fixed your problem or not.
Charge Your AirPods
AirPods with a low battery (think 10% charge or less) will often go in and out, lose sound, and may also lose microphone functionality. You can even permanently shorten your AirPods battery life!
When AirPods are nearly dead, they’re also nearly useless! You can get very little enjoyment out of AirPods that are about to die. And, when they finally do die? They aren’t exactly easy to find, either.
There is a lot more than just sound not working to deal with when Apple AirPods aren’t charged.
That’s why it’s important to keep your AirPods fully charged to ensure that you don’t encounter any of these issues.
It’s not too tough a task, either – AirPods can charge from nearly dead to completely full in under an hour!
Conclusion
AirPods will often say they’re “connected” but no sound will play! If this happens to you, there are several proven ways to fix it:
- Try resetting the Bluetooth on your phone by toggling it off and then on again.
- Reset your AirPods by using “Forget This Device.” Then repair your headphones.
- Power your phone off and then back on again.
- Update your phone’s software to the latest OS.
- Turn off all nearby Bluetooth devices to avoid possible interference.
- Clean your AirPods and charging ports
- Turn off Automatic Ear Detection
- Make sure your AirPods are fully charged
If you try each and every one of these troubleshooting steps, you’re very likely to fix this problem.
Hopefully, you were able to connect your AirPods and get the sound working again successfully. Thanks for reading!